Technical Reference
Customisation
Sensei provides the IQ solution as a set of layers over the existing Project and Power Platform components. The additional components that are provided as part of the solution have the Customizable flag enabled (where possible) to allow almost any provided Dynamics component to be tailored to meet the business requirements. Where the item is not directly customisable (Security Roles, PCF Components, and the Teams App) we have taken steps to ensure that these have configuration options available to control their behaviour.
The solution layering concept is a common technique used throughout the Power Platform and in the case if IQ it is visualised as:
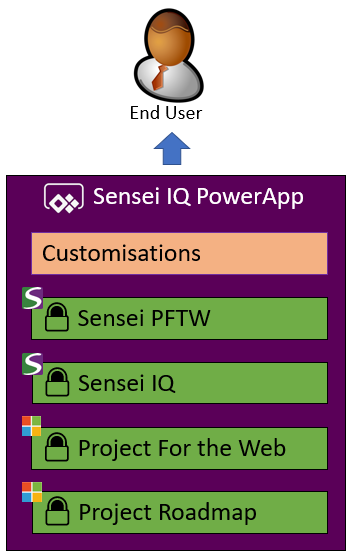
The Solution Layers are (from the bottom up):
- Microsoft Project Roadmap. Roadmap functionality is part of the Project Plan 3 and Project Plan 5 licenses. The Roadmap solution provides base level functionality for many project related functions and was historically released first.
- Project for the Web. This layer provided by Microsoft contains the back-end Dynamics components required for the Project for the Web functionality.
- Sensei IQ. This layer contains the Sensei IQ entities and functions that are not specific to Project for the Web. Sensei IQ solutions targeted at other execution tools may use also this layer.
- Sensei IQ PFTW. This layer includes entities, relationships and functions that provide integration with Microsoft Project for the Web.
- Customisations. This layer can be added by the customer, or by Sensei on the Customer's behalf. It is either the "Default Solution" or
Sensei applies solutions in layers to provide functionality to the end user. Customer specific customisations can be applied on top of the solutions.
SharePoint Group Sites
It is a common requirement to want to add elements or customise the SharePoint Site that is created in conjunction to the Microsoft (O365) Group. The approach to facilitating this is Using Site Designs to Manage Project Life Cycles.
Using techniques such as Hubs Sites, Site Designs, Site Scripts and connected Power Automate Flows allow for an almost infinite level of site customisation capabilities.
SSRS Reports for Dynamics
Dynamics and Model Driven Power Apps have the facility to render SQL Server Reporting Services (SSRS) reports. To create and customise them requires a very specific tool-chain.
To get started with using SQL Server Reporting Services (SSRS) report with model-driven PowerApps, you need to run some specific software. You will need to use FetchXML to write queries against CDS entities. You will need to install the following software in this order.
- Install Visual Studio 2015 (I installed "Visual Studio Professional with Update 3") http://my.visualstudio.com/Downloads
- Install SQL Server Data Tools for Visual Studio 2015 - https://docs.microsoft.com/en-us/previous-versions/mt186501(v=msdn.10)
- Install the v9.0 Dynamics 365 Report Authoring Extension - https://www.microsoft.com/en-us/download/details.aspx?id=56973
You can then use SQL Server Data Tools 2015 to author reports.

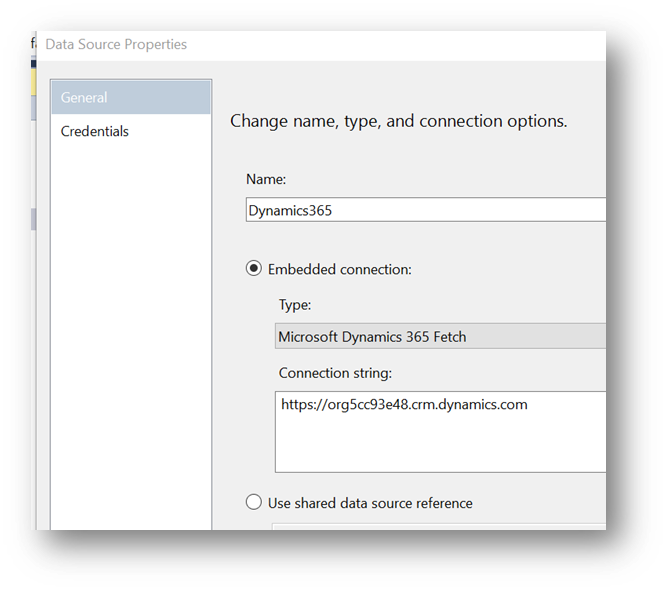
To add a datasource, you use an embedded connection and choose “Microsoft Dynamics 365 Fetch” as your type. For the Connection String, type in your Dynamics 365 root URL.
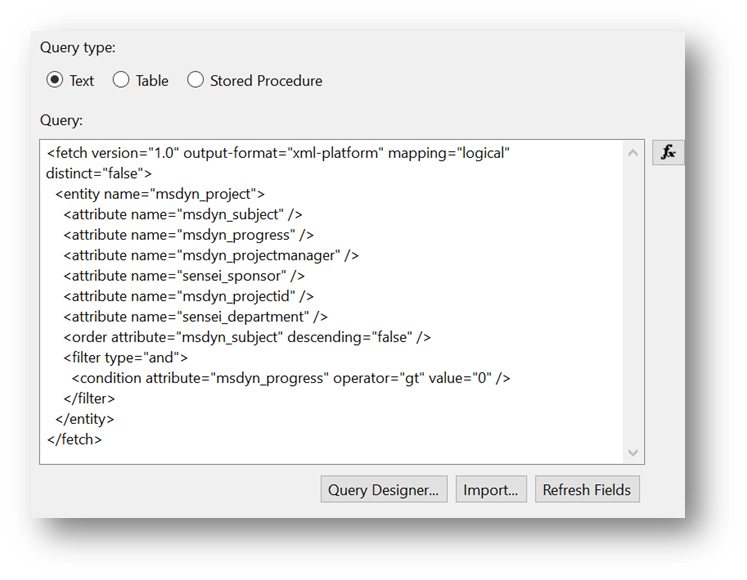
Add a dataset and use FetchXML as your query text. Note, you can use FetchXML Builder from the XRM Toolkit to help you build FetchXML queries.
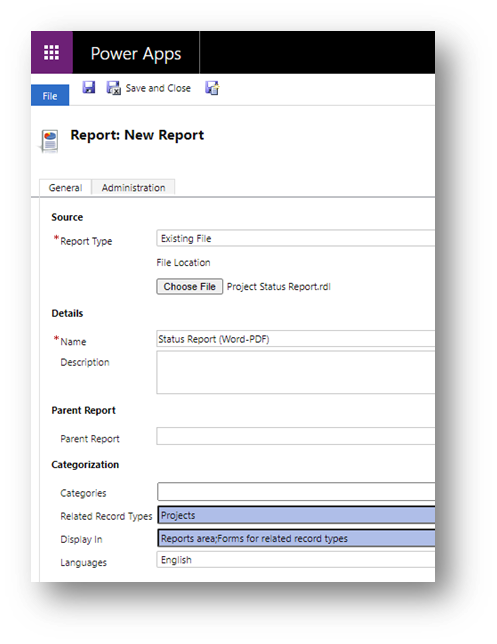
Save the .rdl file and then to PowerApps and navigate to your solution. You can then upload your report and choose the related entity (such as Projects for a Project Status Report).
Note
You cannot overwrite a report in your solution. You will need to delete it and add it back as a new item.
Security
Security Overview
The Security framework for the Sensei.IQ for Project Solution is modelled on the permission model employed by Project for the web and leverages the capabilities of Dynamics 365 Roles.
In order to accommodate both everyday use of IQ and complex security requirements that customers may have, Sensei provide security capabilities through a Basic Security Model as well as a Modular Security Model. The Roles provided in each model can be mixed and matched to suit requirements. In addition, custom roles can be created if required.
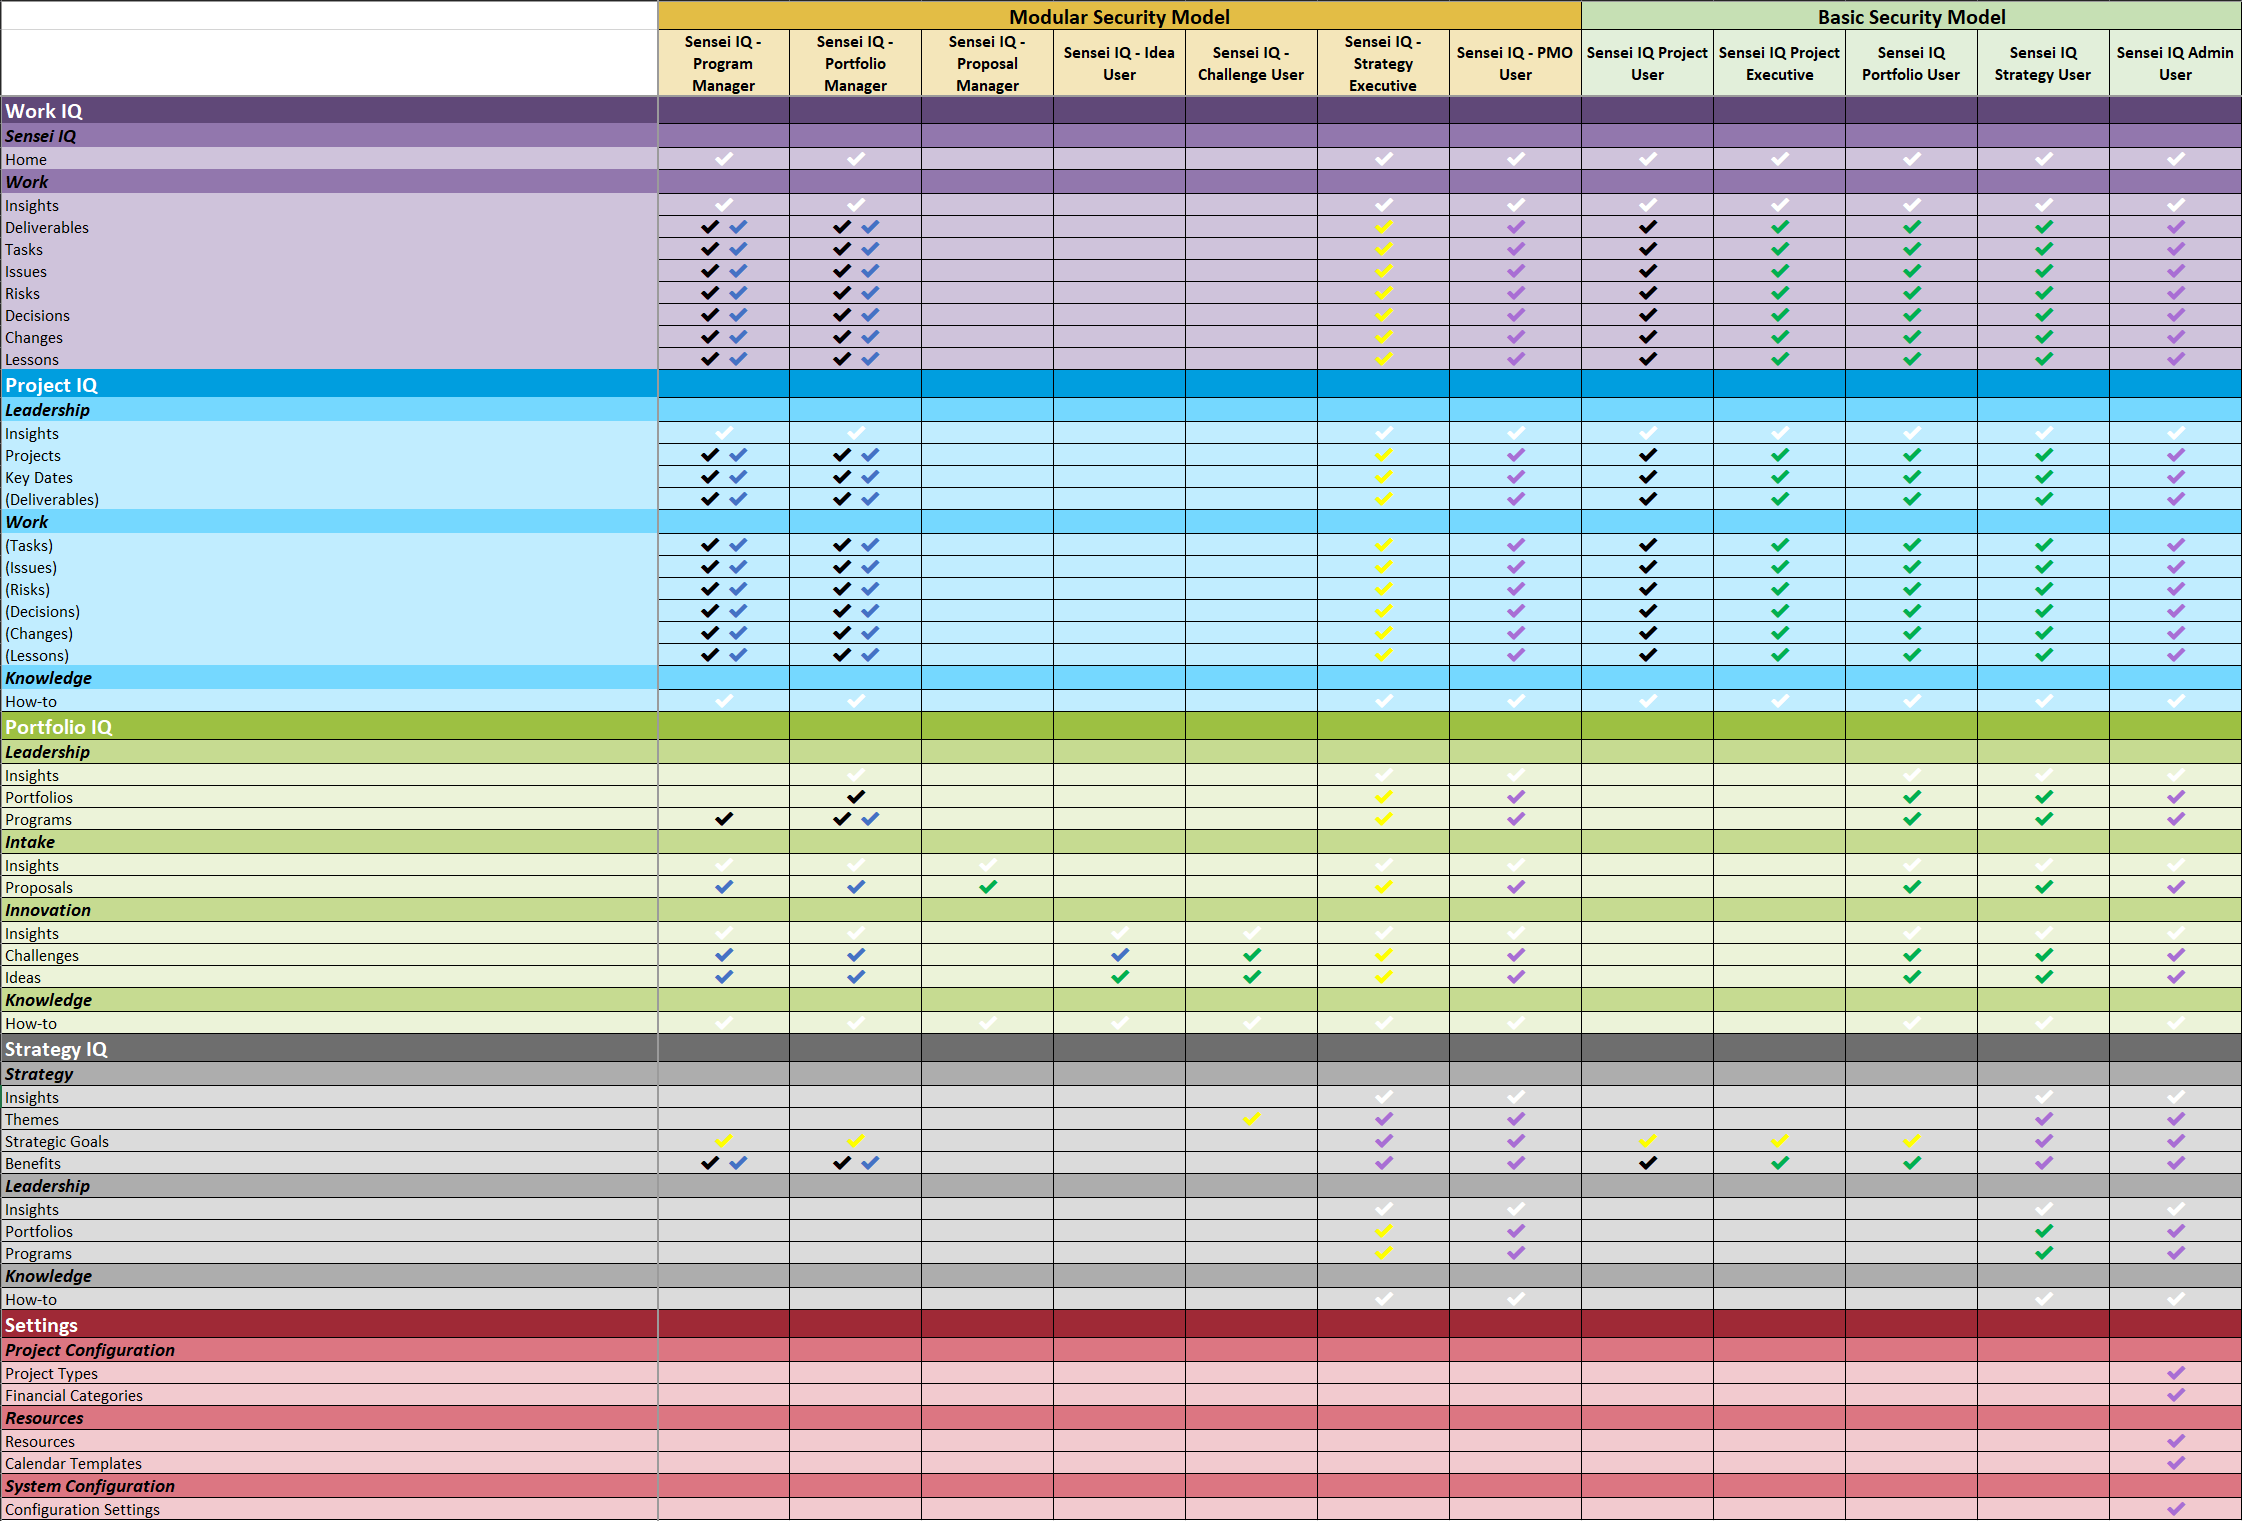
There are five Roles which are shipped as part of the Basic Security Model - each of which provides a layered approach to user access to the system.
Seven additional Roles are included with the Modular Security Model. These Roles provide access to specific functionality within IQ.
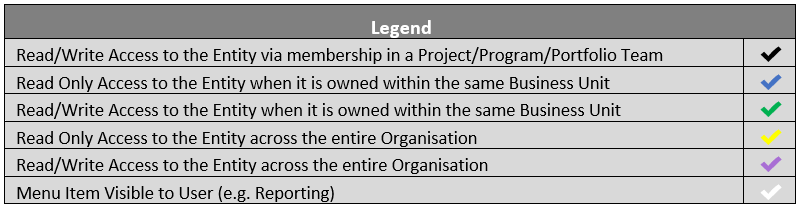
Project for the web leverages the use of Teams in Dynamics 365 to provide group level Ownership to CDS entities. In the same way, Sensei.IQ for Project replicates the ownership behaviour of the records in CDS that relate to Project for the web projects. For example, if a Project for the web project is owned by a Team, that Team will also be attributed Ownership for any Risks, Issues, etc that relate to that project. This provides access to all records relating to the project to the entire project Team. This same behaviour is extended to Portfolios and Programs in IQ.
The following Legend identifies the access level represented by each tick.
Note
Strategy IQ Functionality is only made available when a Strategy IQ license has been activated.
Basic Security Model
In the Basic Security Model each role builds upon the permission set of the underlying role. If using just the Basic Security model, users need only be a member of one Sensei IQ Role.
The Basic Security Model can be depicted as per the following diagram:
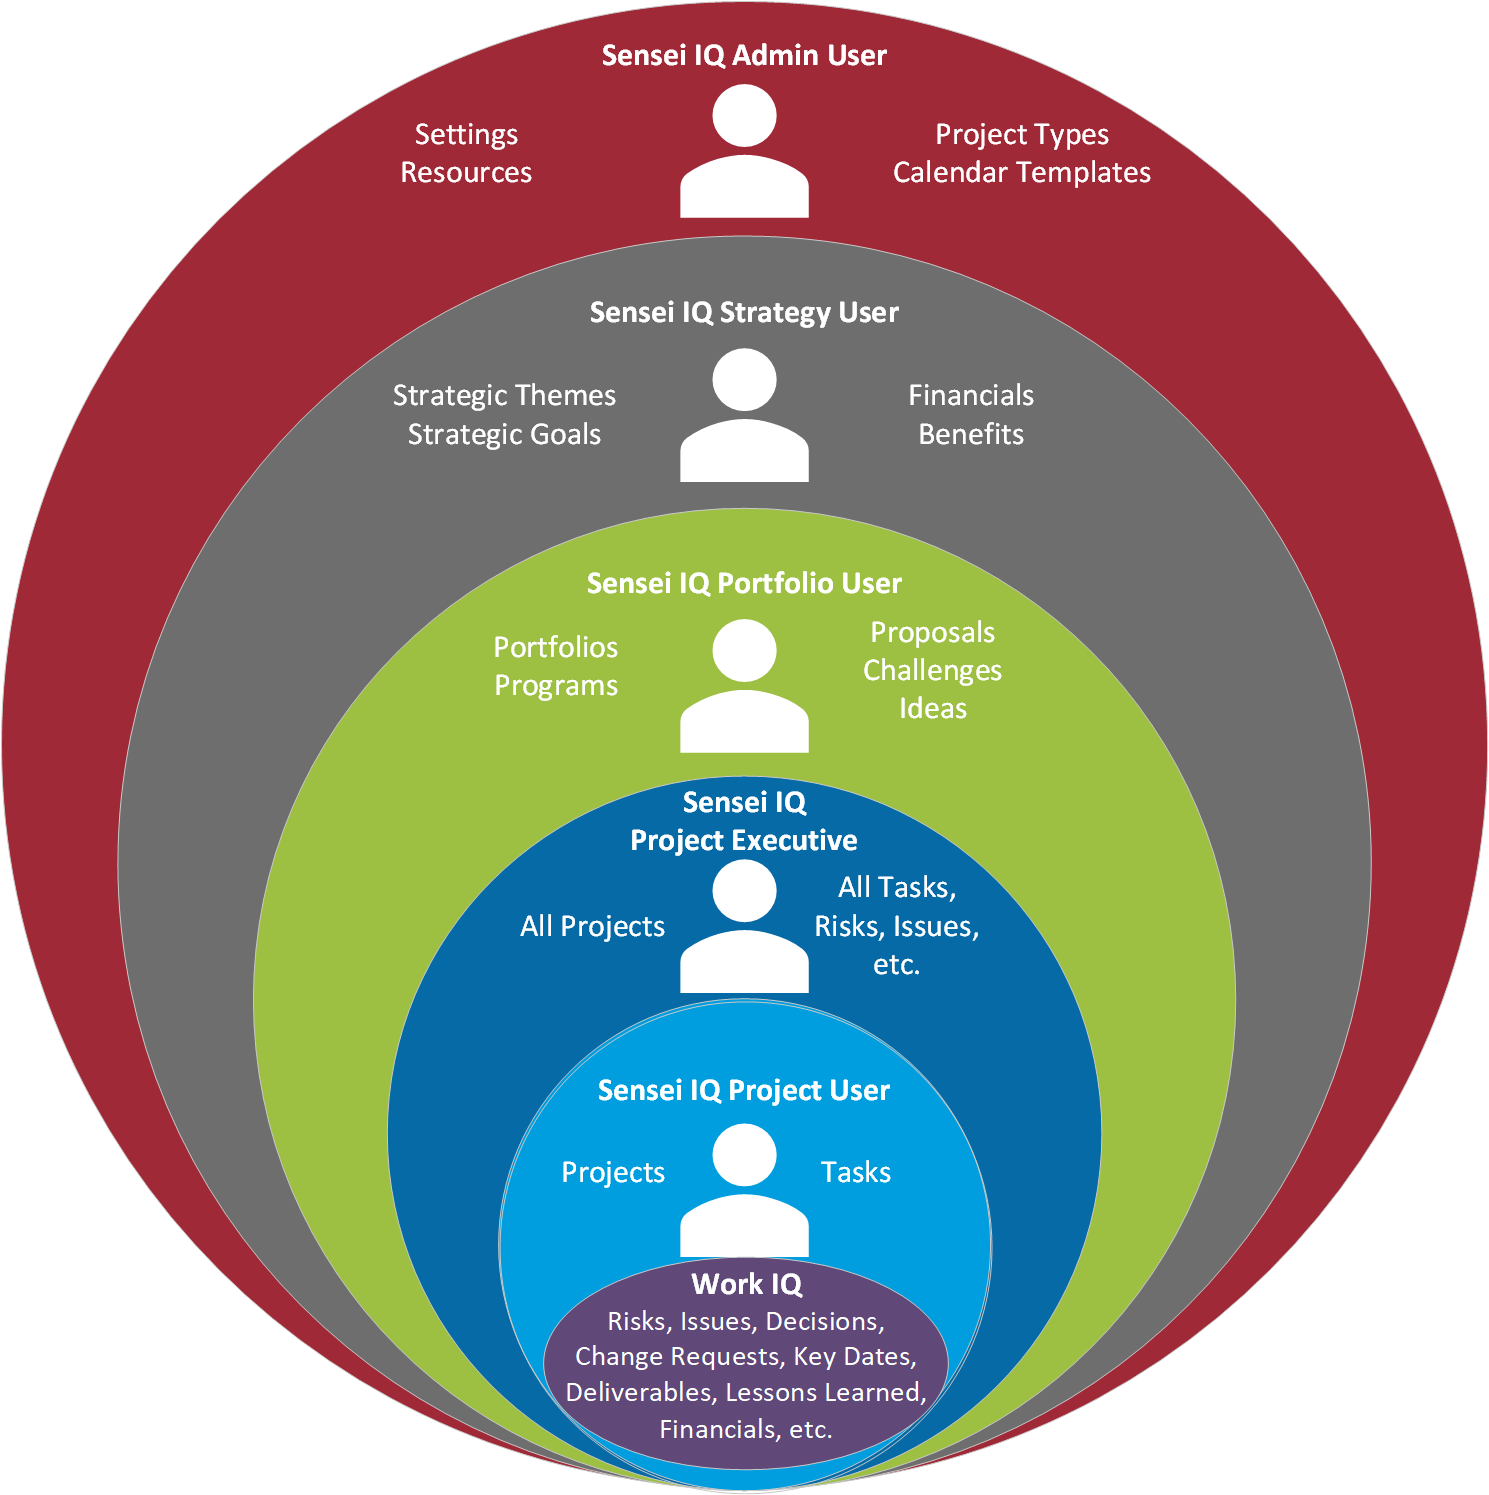
Sensei IQ Project User The Sensei IQ Project User role is the base level role for a user of Sensei IQ for Project. Users in this role have the required permissions to create, update and delete entity records that relate to Project for the web projects that they have created or have been provided access to via a Project Group/Team.
Users who are in this role have access to the Sensei.IQ for Project app and can navigate the Project IQ and Work IQ areas within the app.
Sensei IQ Project Executive This role is intended for Users who require access to all projects in Sensei IQ for Project, but who do not require the Portfolio IQ functionality. Users in this role have the required permissions to create, update and delete entity records that relate to any/all Project for the web projects in the user's Business Unit.
Users who are in this role have access to the Sensei IQ for Project app and can navigate the Project IQ and Work IQ areas within the app.
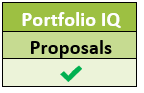
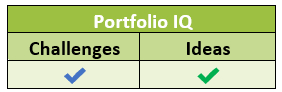
Sensei IQ Portfolio User This role is intended for Users who require access to Portfolio IQ functionality in the Sensei IQ for Project app. This role provides users with access to create and manage Portfolios and Programs and with Read/Write visibility of all Projects and Registers in the user's Business Unit.
Users who are in this role have access to the Sensei IQ for Project app and can navigate the Portfolio IQ, Project IQ and Work IQ areas within the app.
Sensei IQ Strategy User This role is intended for Users who require access to Strategy IQ functionality in the Sensei IQ for Project app. This role provides users with access to create and manage Strategic Themes, Strategic Goals and Benefits within the Organisation, and with visibility of all Portfolios, Programs, Projects and Registers within the user's Business Unit.
Users who are in this role have access to the Sensei IQ for Project app and can navigate the Strategy IQ, Portfolio IQ, Project IQ and Work IQ areas within the app.
Sensei IQ Admin User This role provides Administrator level access to all custom entities relating to Sensei IQ for Project including the ability to create, update and delete any entity records relating to the Solution. Admin access is provided across data for the entire Organisation (e.g. all Business Units). Admin Users are provided with access to all areas in the Sensei IQ for Project app including Settings.
Modular Security Model
The Modular Security Model provides capability for more fine grained controls of which users have access to what functionality within Sensei IQ. Depending on their requirements, a user may be granted more than one of the modular security roles. (The modular security roles could also be used in conjunction with the basic security roles to fulfil specific requirements).
Many roles within the Modular Security Model allow access to be determined by the owning Business Unit of records - giving flexibility for separation of access to data. If no separation of data is required, an organisation could choose to use only the root organisation Business Unit in Dynamics.
Note
Using the Modular Security roles are not designed to be functionally complete alone usually they are applied as a combination with existing security roles.
Sensei IQ - Program Manager
 Users in the Sensei IQ - Program Manager role will be granted:
- Read access to all Projects within the user's Business Unit.
- Read/Write access to all Programs or Projects where they are the sole owner of that record, or where they are part of the Program or Project Group/Team.
- Read access to all Proposals, Challenges and Ideas within the Business Unit.
Note: - A Program Manager will only have visibility of Programs within their own Business Unit if they are either the sole owner of that record or where they are a member of the Program Team/Group.
- A Program Manager will not have visibility of Programs or Projects from other Business Units (unless they have specifically been granted access via the associated Program or Project Group/Team).
Sensei IQ - Portfolio Manager
 Users in the Sensei IQ - Portfolio Manager role will be granted:
- Read access to all Projects within the user's Business Unit.
- Read access to all Programs within the Business Unit.
- Read access to all Proposals, Challenges and Ideas within the Business Unit.
- Read/Write access to all Portfolios, Programs or Projects where they are the sole owner of that record, or where they are part of the Portfolio, Program or Project Group/Team.
Note:
- A Portfolio Manager will only have visibility of Portfolios within their own Business Unit if they are the sole owner of that record or where they are a member of the Portfolio Team/Group.
- A Portfolio Manager will not have visibility of Portfolios, Programs or Projects from other Business Units (unless they have specifically been granted access via the associated Portfolio, Program or Project Group/Team).
Sensei IQ - Proposal Manager
 Users in the Sensei IQ - Proposal Manager role will be granted:
- Read/Write access to all Proposals within the user's Business Unit.
Note:
- Proposal Users will not be able to see Proposals that have been created in a different Business Unit unless those items have been specifically shared with them.
- Proposal Users will not be able to see Projects that have been created from a Proposal unless they have been specifically granted access to that Project through the Project Group/Team.
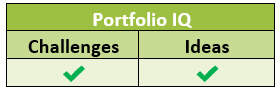
Sensei IQ - Idea User
 Users in the Sensei IQ - Idea User role will be granted:
- Read access to all Challenges within the user's Business Unit.
- Read/Write access to all Ideas within the user's Business Unit.
Note:
- Idea Users will not have visibility of any Ideas or Challenges in different Business Units unless those items have been specifically shared with them.
Sensei IQ - Challenge User
 Users in the Sensei IQ - Challenge User role will be granted:
- Read/Write access to all Challenges within the user's Business Unit.
- Read/Write access to all Ideas within the user's Business Unit.
- Read access to all Strategic Themes in the Organisation (in order to associate a Challenge to a Strategic Theme)
Note:
- Challenge Users will not have visibility of any Ideas or Challenges in different Business Units unless those items have been specifically shared with them.
Sensei IQ - Strategy Executive
 Users in the Strategy Executive role will be granted:
- Read access to all Projects in the entire Organisation.
- Read access to all Programs in the entire Organisation.
- Read access to all Portfolios in the entire Organisation.
- Read access to all Proposals in the entire Organisation.
- Read access to all Challenges in the entire Organisation.
- Read access to all Ideas in the entire Organisation.
- Read/Write access to all Strategic Themes in the entire Organisation.
- Read/Write access to all Strategic Goals in the entire Organisation.
- Read/Write access to all Benefits in the entire Organisation.
Note:
- Strategy Executive users have visibility of records across the entire Organisation, and access to all Areas in the IQ app with the exception of Settings.
Sensei IQ - PMO User
 Users in the PMO User role will be granted:
- Read/Write access to all Projects in the entire Organisation.
- Read/Write access to all Programs in the entire Organisation.
- Read/Write access to all Portfolios in the entire Organisation.
- Read/Write access to all Proposals in the entire Organisation.
- Read/Write access to all Challenges in the entire Organisation.
- Read/Write access to all Ideas in the entire Organisation.
- Read/Write access to all Strategic Themes in the entire Organisation.
- Read/Write access to all Strategic Goals in the entire Organisation.
- Read/Write access to all Benefits in the entire Organisation.
Note:
- PMO Users have Read/Write access to all IQ related records across the entire Organisation, and access to all Areas in the IQ app with the exception of Settings.
Special Cases
Assigned To
In the instance where a user who has an entity record (e.g. a Risk or Action Item) assigned to them (by them being selected in the Assigned To field) and where that user is not part of the project Team, that individual record will be shared with that User - providing them visibility of the entity record. Note that because only the individual item is shared with the User, that user will not have access to other artefacts associated with the Project (including the Project itself).
Sensei IQ - P4TW Business Unit Role
We have identified an issue for users when they are in a Business Unit other than the root org Business Unit when they then try to interact with Project for the web - specifically when they attempt to create Projects or Assign Project Tasks.
When using Business Units, ensure you assign this Role to all users who need to interact with Project for the web.
Permissions Chart
Business Unit Model
In instances where a customer requires complete separation of data, Business Units can be created in Dynamics
Note
For Dynamics there is always an Org Business Unit which sits at the top of the Business Unit tree. (In an out of the box Dynamics environment, all users are part of that root Org Business Unit).
Each User will need to be assigned to their appropriate Business Unit in Dynamics. As shown in the example below by the colored icons next to each Business Unit.
Note
A User can only directly be associated to a single Business Unit.
Based on each Users assigned role different Read/Write access to Portfolios, Programs and Projects within ones Business Unit will be given. Read/Write access if not part of the base role can either be gained through ownership or membership to an Office 365 (O365) Group associated with a Portfolio, Program or Project.
Note
Membership of an O365 Groups would allow for a User in one Business Unit to have access to say a Program in another Business Unit (because they have been explicitly added to that O365 Group).
Example
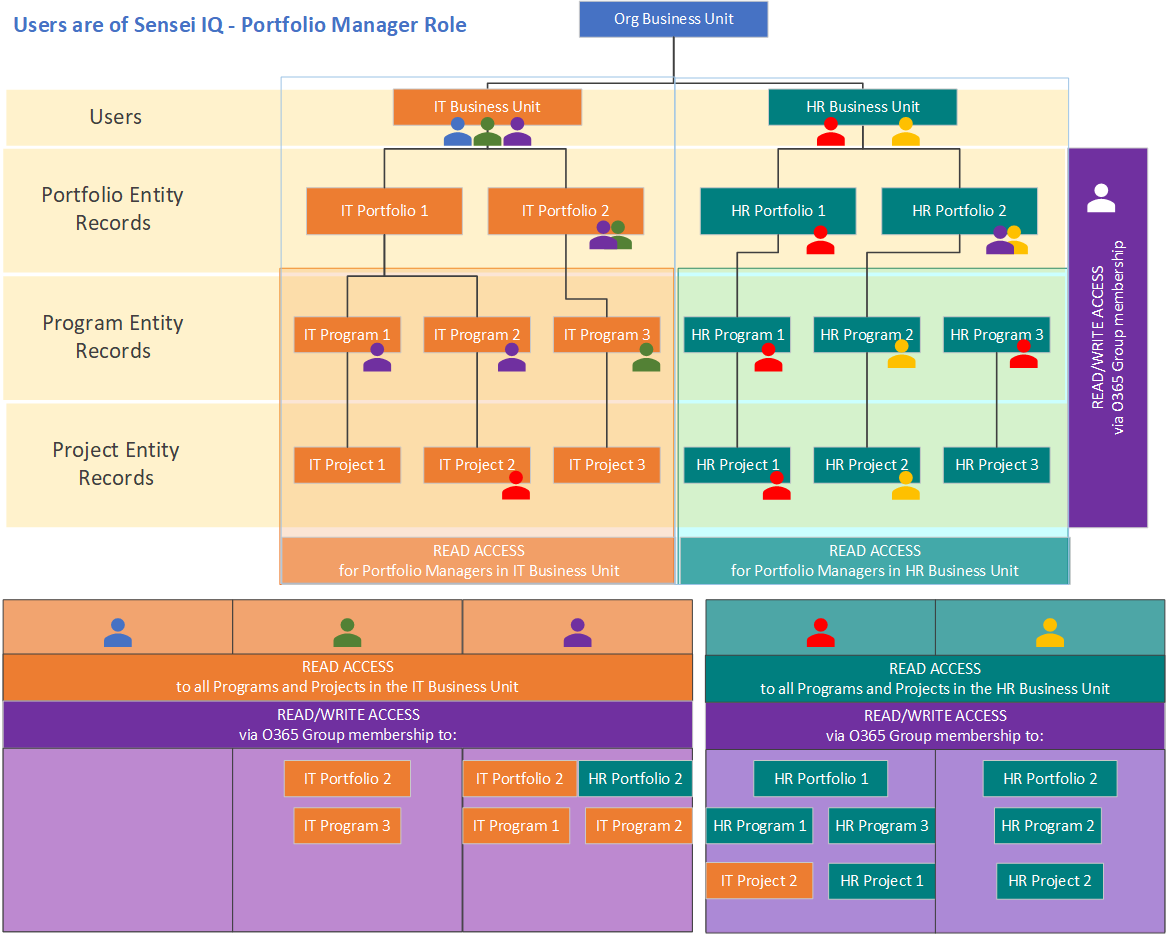
The chart above indicates an organisation where there are two Business Units both of which have been configured as children of the root org Business Unit. There are Users (depicted with the coloured icons) which are each associated with a Business Unit and assigned the “Sensei IQ - Portfolio Manager”.
The “Sensei IQ - Portfolio Manager” role from Modular Security Model above has:
- Read access to all Programs and Projects that are in the User’s Business Unit (Only)
- Read/Write access to any Portfolio, Program or Project where they are either the Owner, or where they are a member of the O365 Group that is the Owner of that record.
In the example the Blue, Green and Purple are assigned to the IT Business Unit and Red, Yellow are assigned to the HR Business Unit as indicated by the colored person icon on the associated Business Unit. These Users have Read access to all Portfolios, Programs and Projects within their Business Unit as indicated at top by the vertical box surrounding the Business Unit in its associated color.
Read/Write access is indicated by colored person icon next to a Portfolio, Program or Project and is granted via Ownership within ones Business Unit or by explicit membership to the associated O365 Group.
Note
Once a User has been granted membership in an O365 Group that is an owner of a Portfolio, Program or Project they will have read/write access to that entity record plus the artefacts (e.g. Risks) that are directly associated with that entity record.
In our example the table below the chart indicates the explicit assignment to O365 Groups per User. For each of these Users we will look at their permissions
IT Business Unit
 Blue User (Base Case) is assigned to no O365 Groups as shown in the table. As a result is the User has Read Only access to Programs and Projects within the IT Business Unit because Blue user is assigned to the IT Business Unit in the chart above.
- Read access to all “IT Business Unit” Programs and Projects as assigned to the IT Business Unit
 Green User (Standard Case) is assigned explicitly to two O365 Groups (IT Portfolio 2 and IT Program 3) as a result this User has Read/Write access as indicated in the chart with a Green User against both groups. It has Read Only access to all other Programs and Projects within the IT Business Unit as Green is also assigned to the IT Business Unit.
- Read access to all “IT Business Unit” Programs and Projects as assigned to the IT Business Unit
- Read/Write access to “IT Portfolio 2 and IT Program 3”
 Purple User (Special Case) is assigned explicitly to the “HR Portfolio 2” O365 Group in “HR Business Unit”. This is not standard practice within Business Units, however is possible Providing Read/Write access explicitly to “HR Portfolio 2” Only within the “HR Business Unit”. No other Portfolios, Programs or Projects from HR Business Unit are accessible. Purple also has Read/Write access to (IT Portfolio 2, IT Program 1 and IT Program 2) and Read Only access to all other Programs and Projects within the IT Business Unit.
- Read access to all “IT Business Unit” Programs and Projects
- Read/Write access to “IT Portfolios 2, IT Program 1, IT Program 2 and HR Portfolio 2”
HR Business Unit
 Yellow User (Standard Case)
- Read access to all “HR Business Unit” Programs and Projects as assigned to the HR Business Unit
- Read/Write access to “HR Portfolio 2, HR Program 2 and HR Project 2”
 Red User (Special Case)
- Read access to all “HR Business Unit” Programs and Projects
- Read/Write access to “HR Portfolio 1, HR Program 1, HR Program 3, HR Project 1 and IT Project 1”
Note
Changing the base role from “Sensei IQ - Portfolio Manager” would result in different Read/Write permissions.
Setting up AAD Sync
It is possible to set up AAD sync of users from an O365 Group into a Dynamics Team. That Dynamics Team can then be granted Roles that give access to Sensei IQ (which would therefore facilitate membership of those Roles to be determined by membership in an O365 Group).
The steps to set this up are as follows:
- Create an O365 Group or identify an existing O365 Group that you wish to use for synchonization.
- Identify the Object Id of this Group (this is visible from within Azure Active Directory).

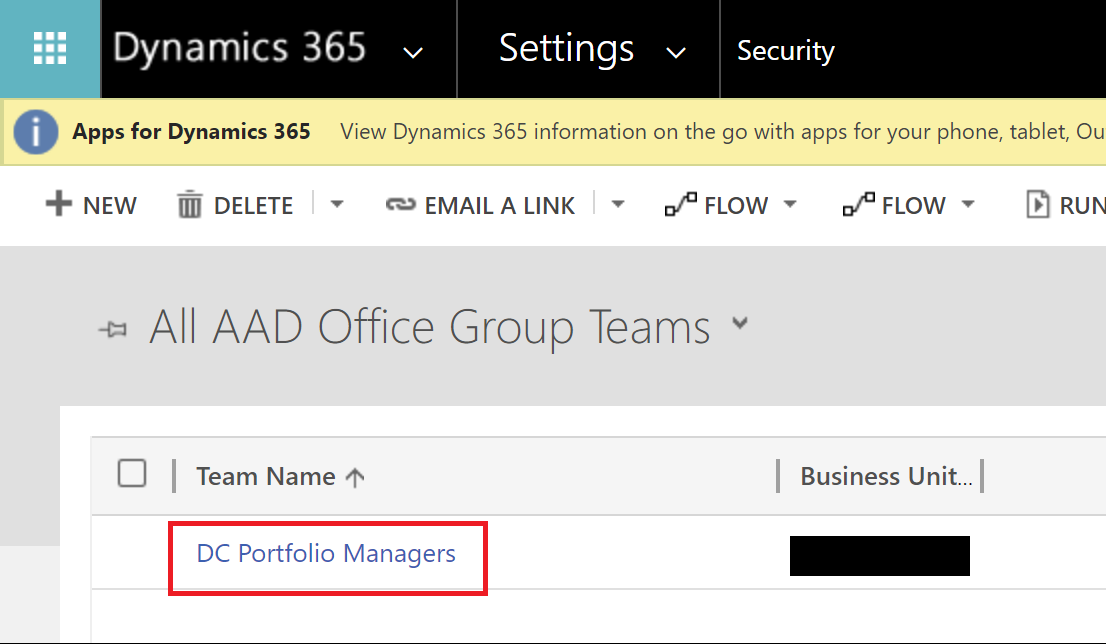
- From the Dynamics Advanced settings portal, select Settings > Security
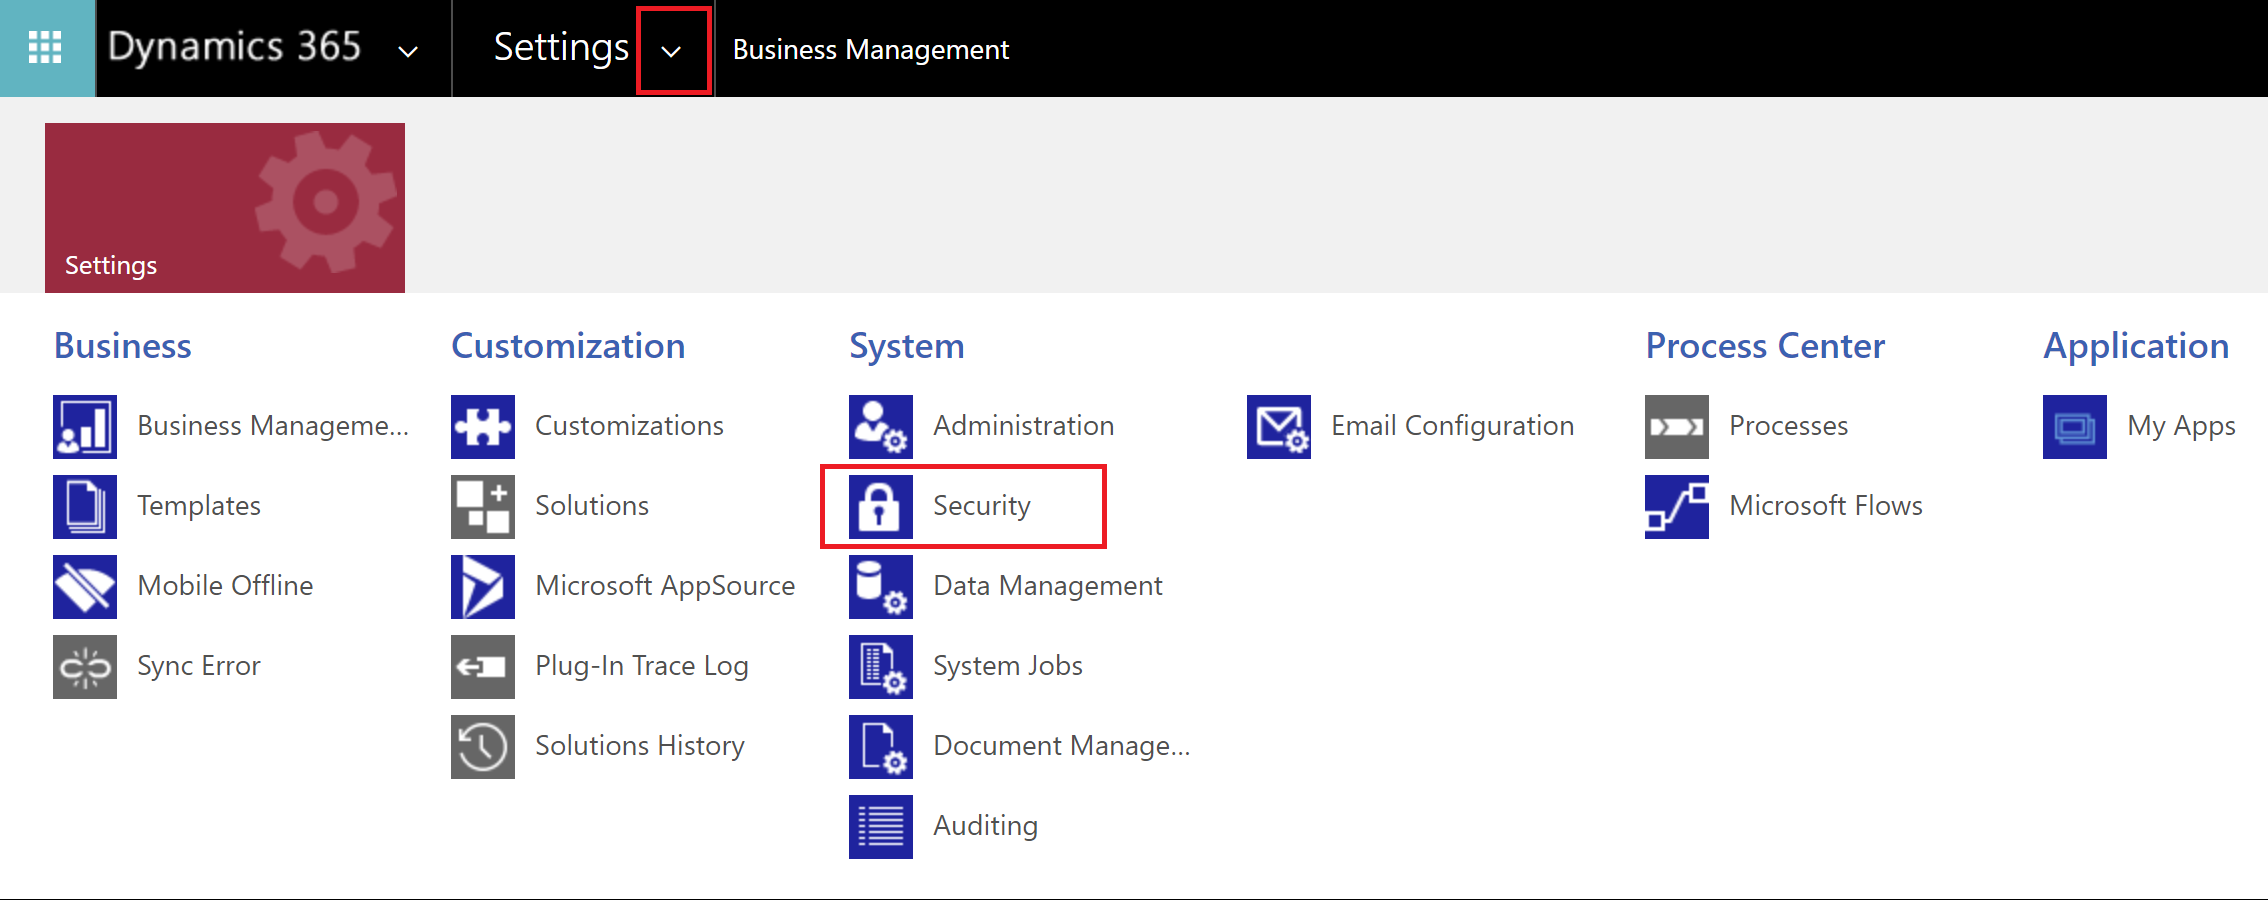
- Select Teams
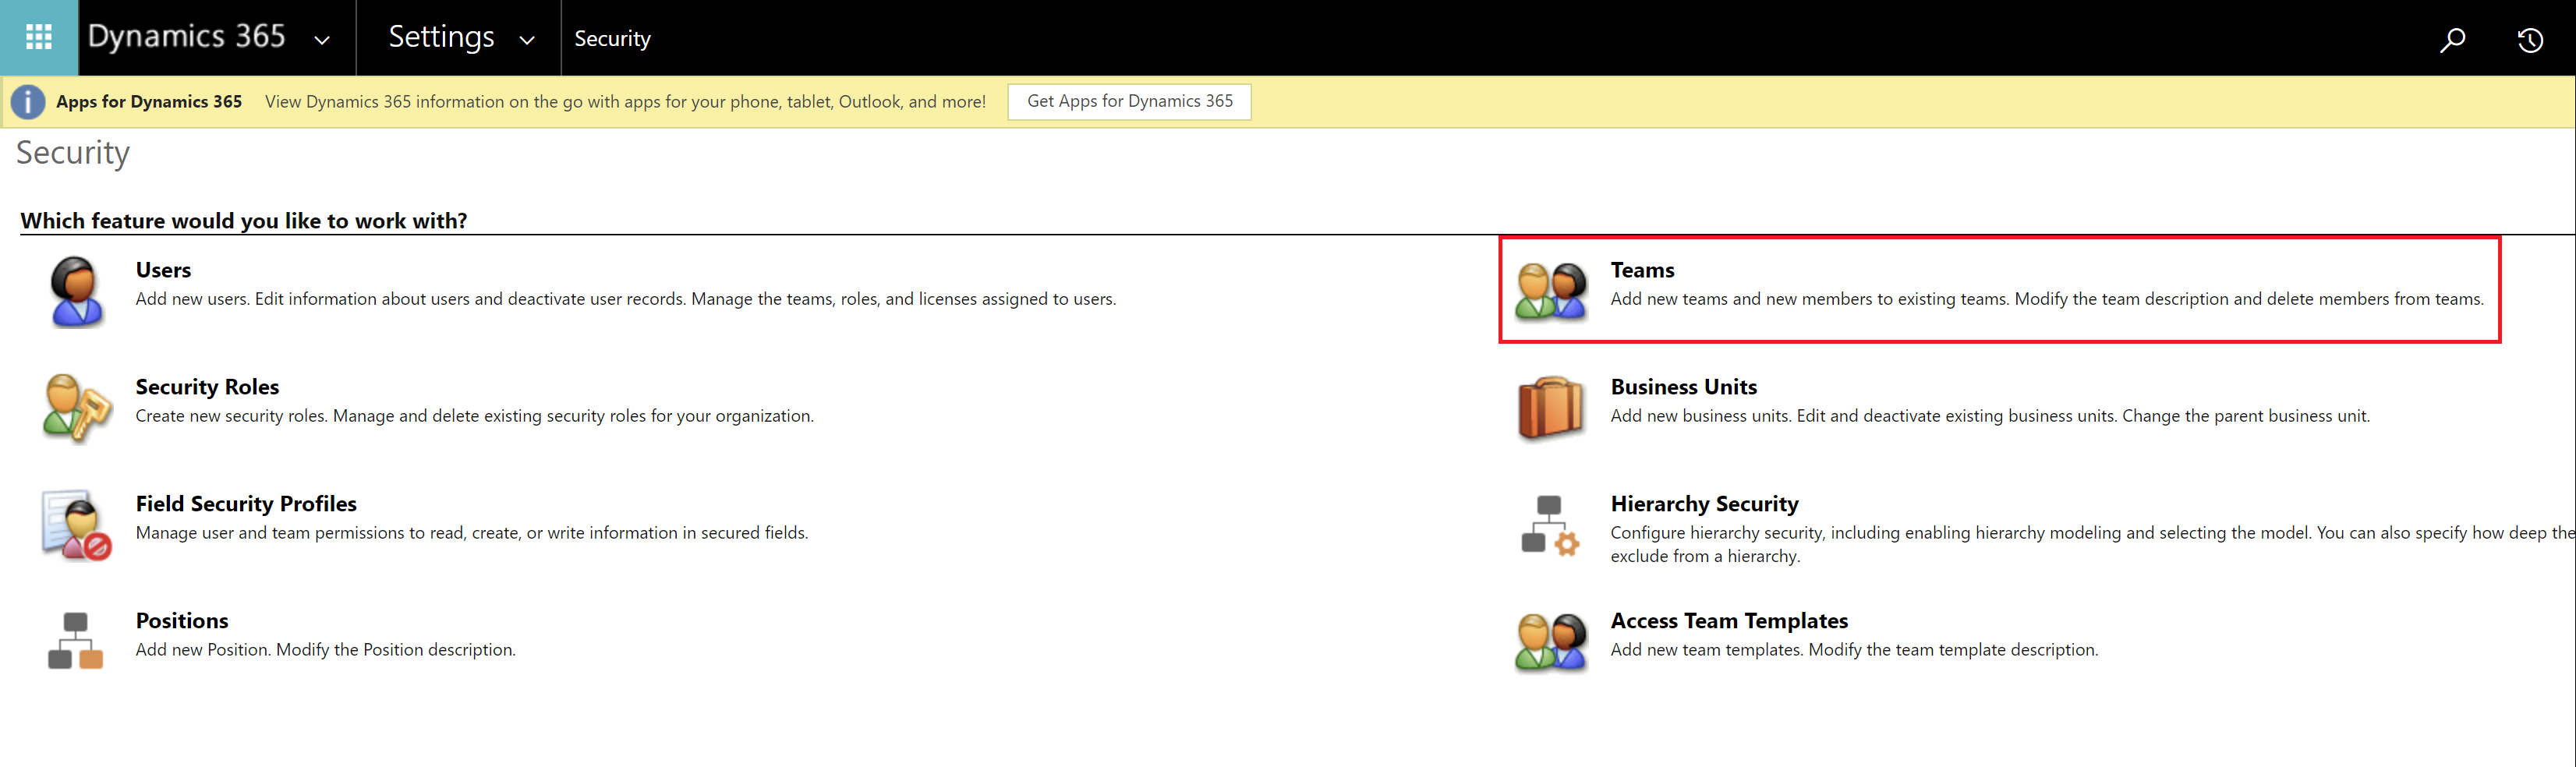
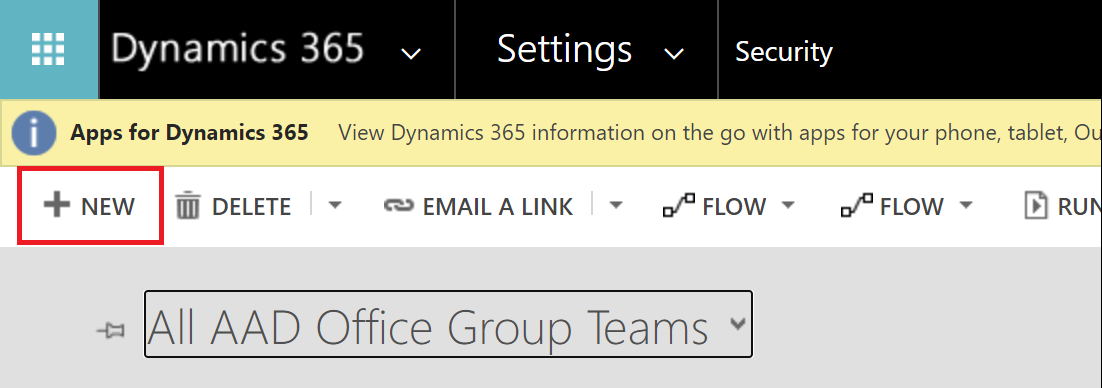
- Select All AAD Office Group Teams
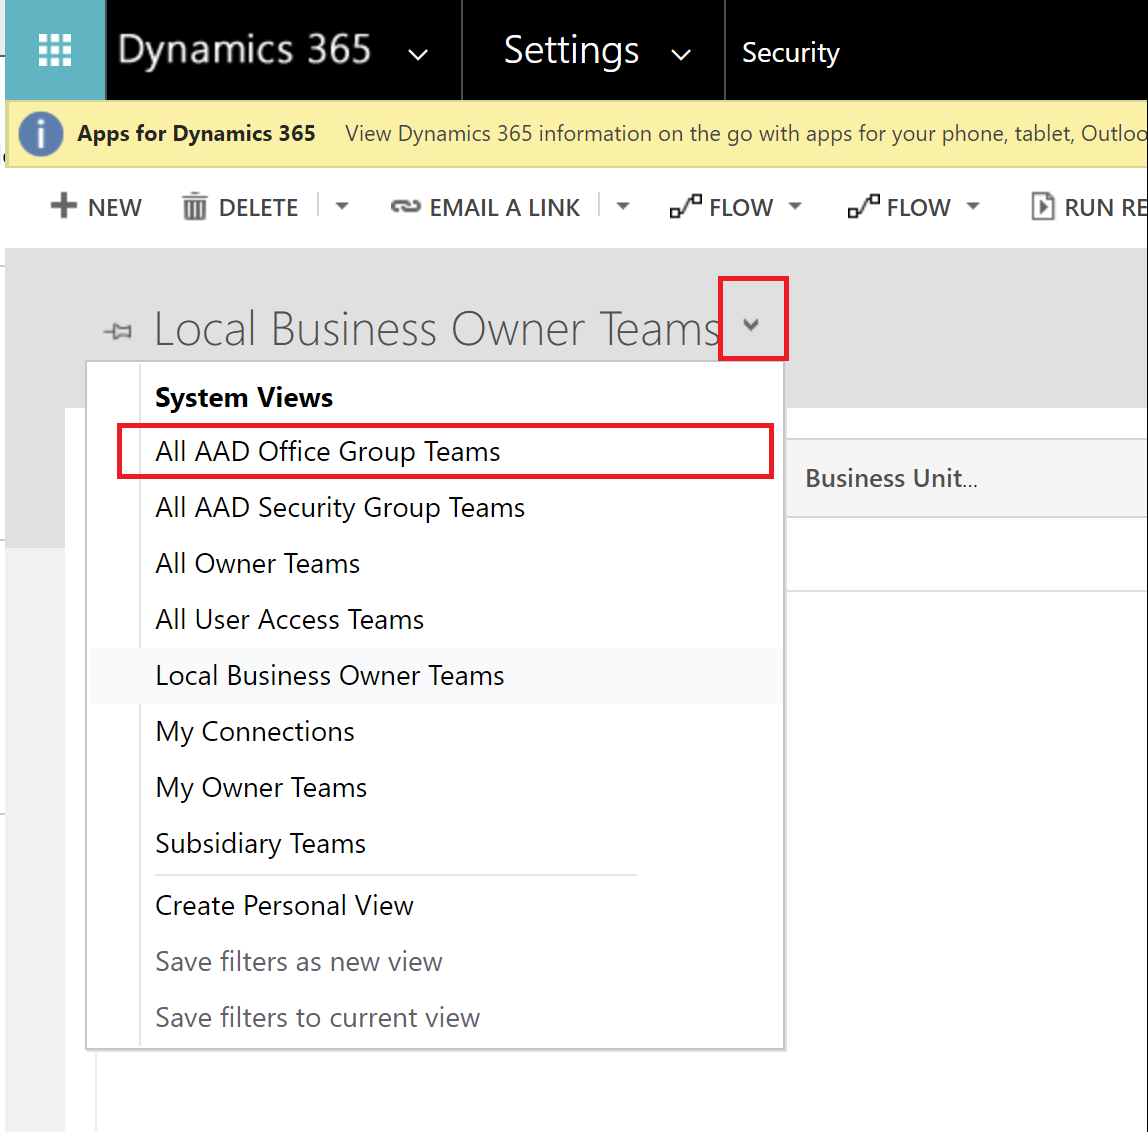
- Select + NEW
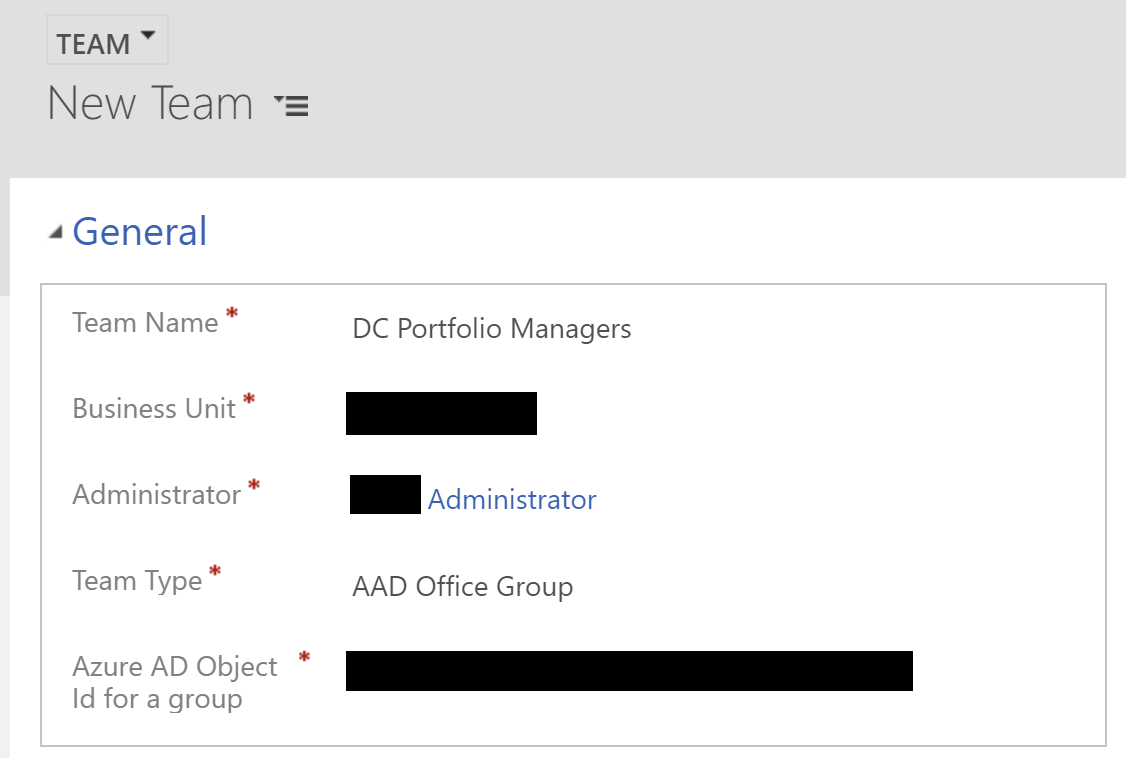
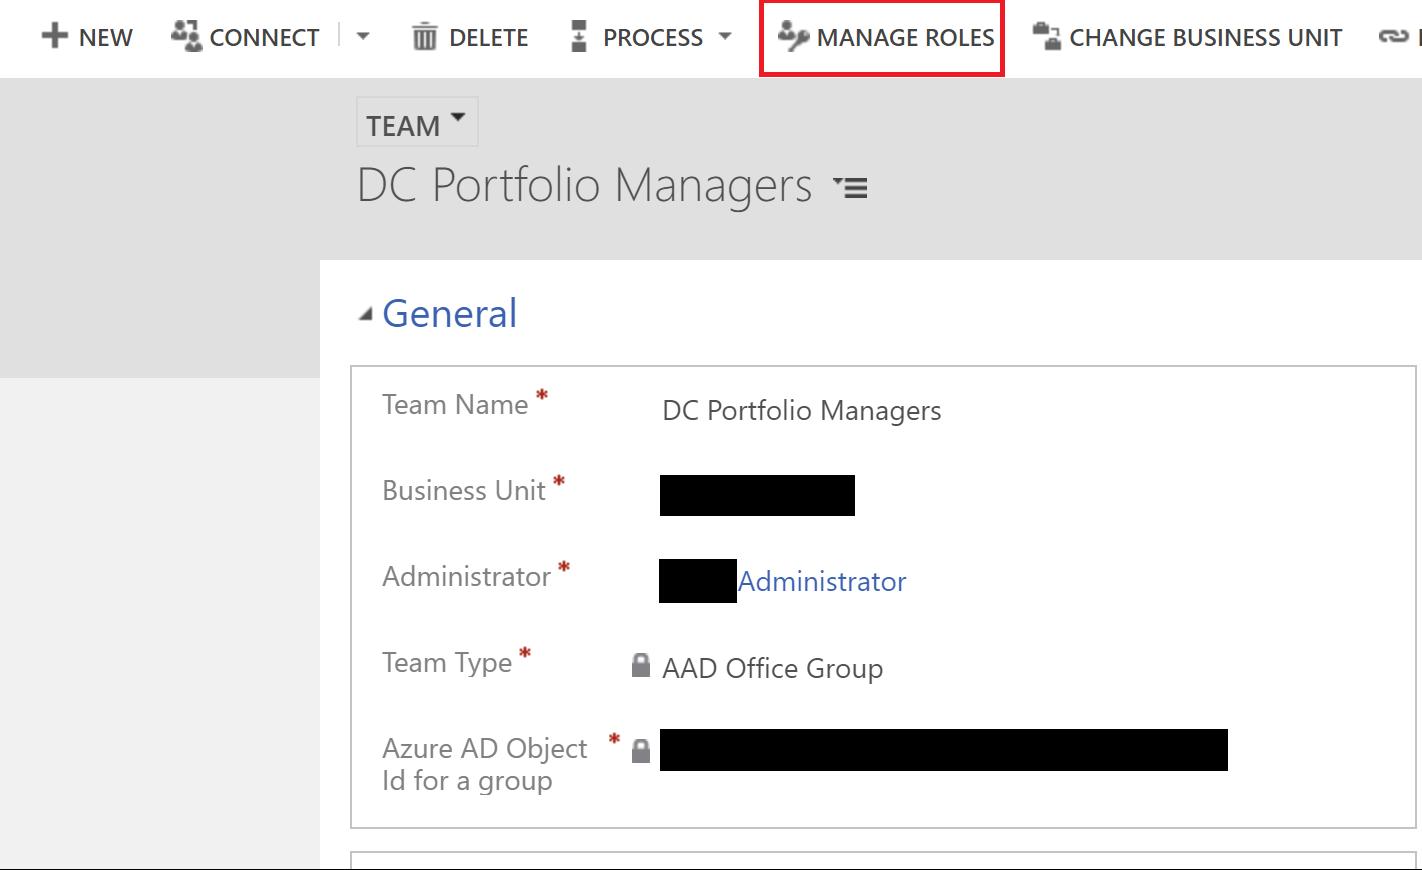
- Enter the Team Name (as you would like it to appear in Dynamics), select an Administrator, select AAD Office Group as the 'Team Type', and enter the Azure AD Object Id that you identified earlier, then press Save and Close.
- Select your newly created Team
- Select MANAGE ROLES
- Select the Role(s) that you would like to automatically grant to members of the identified Office 365 Group, then press OK.
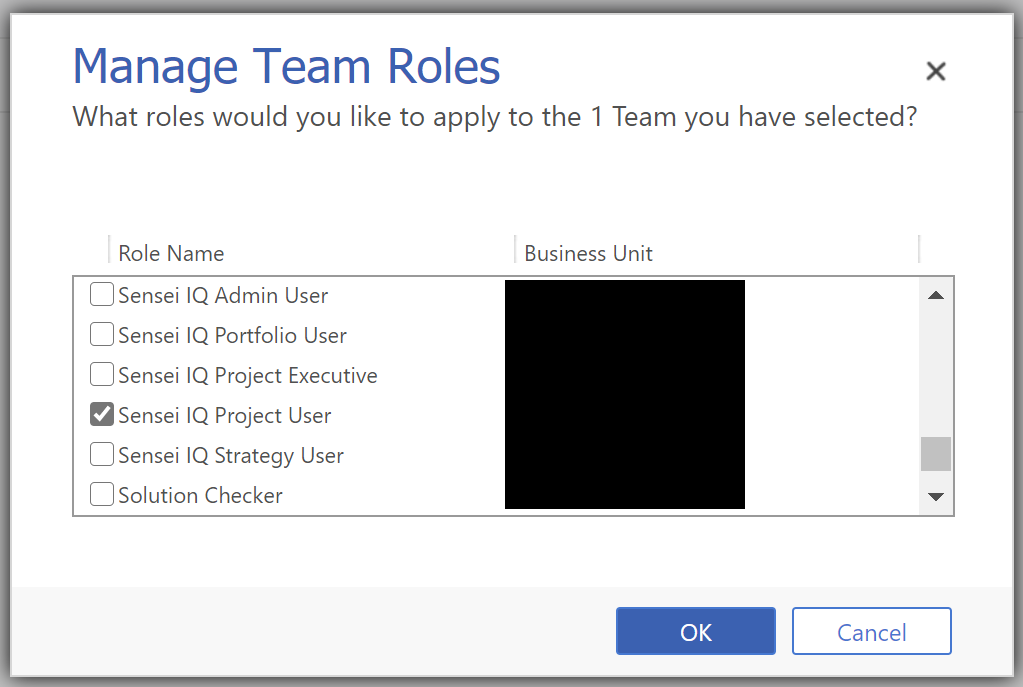
Note that members of the O365 Group will not appear in the list of Team members in the Dynamics Team until the user next logs in to Dynamics/PowerApps. At that time their Role access will be automatically granted.
If an existing User is later removed from the O365 Group their Role access will also be removed.
Settings
| Name | Description | Type | Default |
|---|---|---|---|
| Fiscal Year Start Month Number | Integer representing the month that is considered to be the start month for a new Fiscal Year. Used by the Financial component of Sensei.IQ. [Note: 1 = Jan, 4 = Apr, 7 = Jul, 10 = Oct] | Integer | 7 |
| Key Dates Kanban - Configuration | Allows you to customize the columns shown in the Key Dates Kanban control, as well as their color and icon displayed. The mapping of the option status to the column is done by the id to ensure that labels update automatically. | JSON | See example JSON below |
| Power BI Insights - Portfolio IQ Innovation | The PowerBI embed url for the Portfolio IQ Innovation Insights page. | Url | [Environment Specific] |
| Power BI Insights - Portfolio IQ Intake | The PowerBI embed url for the Portfolio IQ Intake Insights page. | Url | [Environment Specific] |
| Power BI Insights - Portfolio IQ Leadership | The PowerBI embed url for the Portfolio IQ Insights page. | Url | [Environment Specific] |
| Power BI Insights - Project IQ Leadership | The PowerBI embed url for the Project IQ Insights page. | Url | [Environment Specific] |
| Power BI Insights - Strategy IQ Leadership | The PowerBI embed url for the Strategy IQ Insights page. | Url | [Environment Specific] |
| Power BI Insights - Work IQ | The PowerBI embed url for the Work IQ Insights page. | Url | [Environment Specific] |
| Proposal Channel | Channel for proposal notifications. | Text | General |
| Proposal Team | Team name for proposal notifications. | Text | Project Workflow Approvers |
| Role Field Check - Configuration | This will determine which fields are only shown to certain roles. We will append Portfolio and Strategy fields and tabs to the configuration below. | JSON | See example JSON below |
| Role Field Check - Disable | Disabling this will allow users to view all fields no matter if they have a certain role. By default we hide Portfolio and Strategy specific fields from users who do not have those roles. | boolean | true |
| Tabs for Portfolio details in Sensei IQ | Controls which of the Tabs on the Portfolio form are shown to users. | JSON | See example JSON below |
| Tabs for Program details in Sensei IQ | Controls which Tabs on the Program form are shown to Users. | JSON | See example JSON below |
| Teams App - Channel Tab Configuration | Specifies the channel tabs that will be created by the Teams app for each project. The array contains a list of the Microsoft Graph objects to create a channel tab. The following tokens will be replaced with the project specific value. {projectId}, {orgUrl}, {appId} For information on configuration of the different supported app tabs see https://docs.microsoft.com/en-us/graph/teams-configuring-builtin-tabs#power-bi-tabs For information on using filters in an embed url see here https://powerbi.microsoft.com/en-us/blog/easily-embed-secure-power-bi-reports-in-your-internal-portals-or-websites/ |
JSON | See example JSON below |
| Teams App - Disable Teams | Will disable the open in teams button in both the project ribbon as well as the teams app. | boolean | false |
| Teams App - Tab Configuration | Sets the additional tabs that will appear in the Teams app. | JSON | See example JSON below |
| InstrumentationKey | Used to override telemetry collection. Set this value to "Disabled" to disable telemetry collection | GUID | <Not Set> |
To add or edit a value in the Settings Configuration table, you must be an administrator of the application. Launch the app and go to the Settings area in the bottom left (if you do not see Settings, you are not an Administrator).
To assist in the editing of JSON settings values, a User Interface is rendered based on a JSON Schema that has been configured for that setting. This User Interface will be shown be default when you open the setting in Edit mode.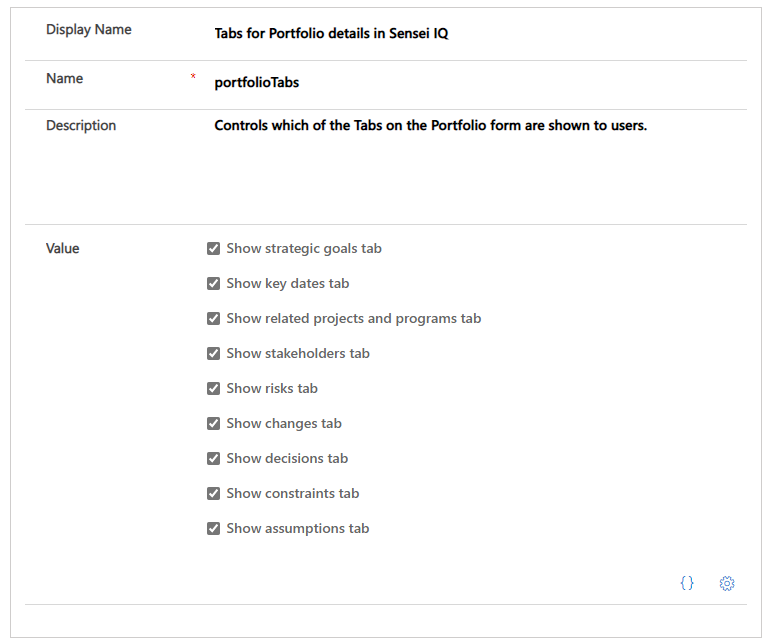
To view the raw JSON setting value (and edit the raw value if you prefer), you can select the 'Edit JSON' button in the bottom right corner of the Value field section.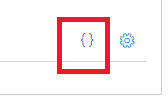
To switch back to using the User Interface, select the 'Use Form' button that now appears in the bottom right corner of the Value field section.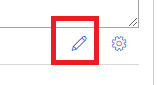
To configure the JSON Schema for the selected Setting, select the Edit Settings button located in the bottom right corner of the Value field section.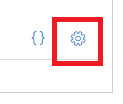
The JSON Form Settings allow you to configure a JSON Schema, which identifies the structure of the JSON setting value, and optionally also a UI Schema which allows you to determine how the UI should be rendered.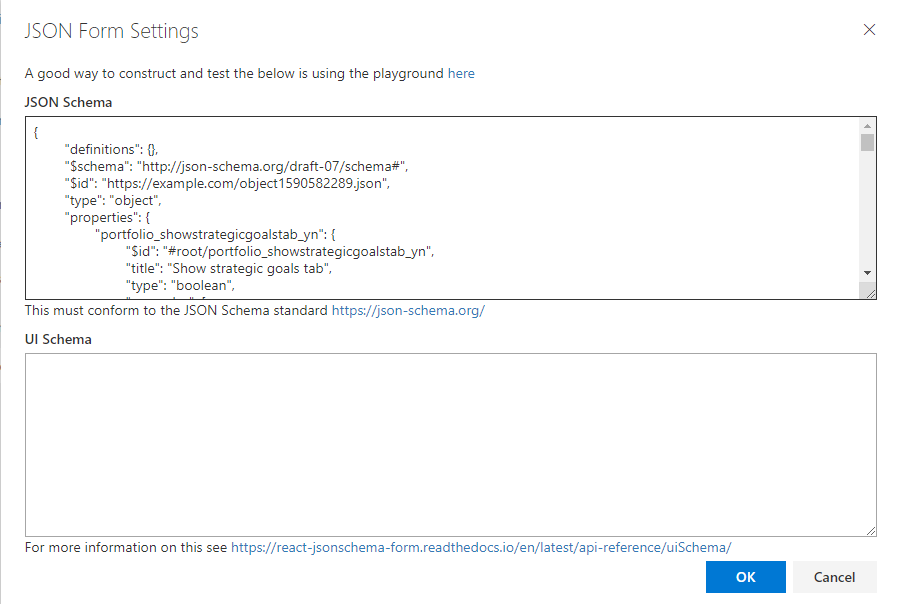 The JSON Schema must conform to the JSON Schema standard
More information on the UI Schema
Key Dates Kanban Configuration: Example JSON
{
    "columns": [ {
                    "value": 955000002,
                    "colour": "#D80010",
                    "iconResource": "sensei_Red-OffTrack.svg"
                 },
                 {
                    "value": 955000001,
                    "colour": "#FFB600",
                    "iconResource": "sensei_Yellow-Warning.svg"
                 },
                 {
                    "value": 955000000,
                    "colour": "#00C154",
                    "iconResource":  "sensei_Green-OnTrack.svg"
                 },
                 {
                    "value": 1,
                    "colour":"#0071BD",
                    "iconResource":"sensei_NotSet.svg"
                 },
                 {
                    "value": 955000003,
                    "colour": "#999999",
                    "iconResource": "sensei_Done.svg"
                 }]
}
Role Field Check - Configuration: Example JSON
{
  "fields": [],
  "tabs": []
}
Tabs for Portfolio details in Sensei IQ: Example JSON
{
    "portfolio_showstrategicgoalstab_yn": true,
    "portfolio_showkeydatestab_yn": true,
    "portfolio_showrelatedprojectsprogramstab_yn": true,
    "portfolio_showstakeholderstab_yn": true,
    "portfolio_showriskstab_yn": true,
    "portfolio_showchangestab_yn": true,
    "portfolio_showdecisionstab_yn": true,
    "portfolio_showconstraintstab_yn": true,
    "portfolio_showassumptionstab_yn": true
}
Tabs for Program details in Sensei IQ: Example JSON
{
    "program_showstrategicgoalstab_yn": true,
    "program_showkeydatestab_yn": true,
    "program_showprojectstab_yn": true,
    "program_showstatusupdatestab_yn": true,
    "program_showstakeholderstab_yn": true,
    "program_showriskstab_yn": true,
    "program_showissuestab_yn": true,
    "program_showchangerequeststab_yn": true,
    "program_showdecisionstab_yn": true,
    "program_showconstraintstab_yn": true,
    "program_showassumptionstab_yn": true,
    "program_showlessonslearnedtab_yn": true
}
Teams App - Channel Tab Configuration: Example JSON
[
    { "displayName": "Project IQ",
      "teamsAppId": "com.microsoft.teamspace.tab.web",
      "configuration": {
                         "entityId": "",
                         "contentUrl": "{orgUrl}/main.aspx?appid={appId}&pagetype=entityrecord&navbar=entity&etn=msdyn_project&id={projectId}",
                         "websiteUrl": "{orgUrl}/main.aspx?appid={appId}&pagetype=entityrecord&navbar=entity&etn=msdyn_project&id={projectId}",
                         "removeUrl": "" }
    },
    { "displayName": "Tasks",
      "teamsAppId": "com.microsoft.teamspace.tab.web",
      "configuration": {
                         "entityId": "",
                         "contentUrl": "https://project.microsoft.com/en-US/#/taskgrid?projectId={projectId}&dynamicsUI=true",
                         "websiteUrl": "https://project.microsoft.com/en-US/#/taskgrid?projectId={ProjectId}&dynamicsUI=true",
                         "removeUrl": ""}
    },
    { "displayName": "Risks",
      "teamsAppId": "com.microsoft.teamspace.tab.web",
      "configuration": {
                         "entityId": "",
                         "contentUrl": "{orgUrl}/main.aspx?appid={appId}&pagetype=entityrecord&navbar=entity&etn=msdyn_project&id={projectId}&extraqs=TabToFocus%3Dtab_risks",
                         "websiteUrl": "{orgUrl}/main.aspx?appid={appId}&pagetype=entityrecord&navbar=entity&etn=msdyn_project&id={projectId}&extraqs=TabToFocus%3Dtab_risks",
                         "removeUrl": "" }
    },
    { "displayName": "Insights",
      "teamsAppId": "com.microsoft.teamspace.tab.web",
      "configuration": {
                         "entityId": "",
                         "contentUrl": "https://app.powerbi.com/reportEmbed?reportId=229fab29-9ac3-462b-b651-d5ed9b08950d&autoAuth=true&ctid=f25fec38-56ea-426a-8467-33a4ded1724c&config=eyJjbHVzdGVyVXJsIjoiaHR0cHM6Ly93YWJpLWF1c3RyYWxpYS1lYXN0LWEtcHJpbWFyeS1yZWRpcmVjdC5hbmFseXNpcy53aW5kb3dzLm5ldC8ifQ%3D%3D&pageName=ReportSectione1da9ba420a88d51560b&filter=Projects/ProjectID%20eq%20'{projectId}'",
                         "websiteUrl": "https://app.powerbi.com/reportEmbed?reportId=229fab29-9ac3-462b-b651-d5ed9b08950d&autoAuth=true&ctid=f25fec38-56ea-426a-8467-33a4ded1724c&config=eyJjbHVzdGVyVXJsIjoiaHR0cHM6Ly93YWJpLWF1c3RyYWxpYS1lYXN0LWEtcHJpbWFyeS1yZWRpcmVjdC5hbmFseXNpcy53aW5kb3dzLm5ldC8ifQ%3D%3D&pageName=ReportSectione1da9ba420a88d51560b&filter=Projects/ProjectID%20eq%20'{projectId}'",
                         "removeUrl": "" }
    }
]
Teams App - Tab Configuration: Example JSON
[
    { "displayName": "Projects",
      "entityName": "msdyn_project",
      "viewName": "All Active Projects",
      "hideStatus": true,
      "orderActiveStage": 3,
      "orderKPI": 4,
      "securityRoleIds": []
    },
    { "displayName": "Programs",
      "entityName": "sensei_program",
      "viewName": "All Active Programs",
      "securityRoleIds": [ "d97d1f3f-8f4c-ea11-a812-000d3a7981c7" ]
    },
    { "displayName": "Portfolios",
      "entityName": "sensei_portfolio",
      "viewName": "All Active Portfolios",
      "hideKPI": true,
      "securityRoleIds": [ "d97d1f3f-8f4c-ea11-a812-000d3a7981c7" ],
      "customRollups": [ {
                          "displayName": "% Complete",
                          "logicalName": "projectrollup_percentcompletewholenumber",
                          "attributeType": "Integer",
                          "operation": 1,
                          "resultMultiplier": 100,
                          "left": [ { "fieldName": "sensei_msdyn_project_effortcompleted" },
                                    { "aggregationUrl": "/api/data/v9.0/sensei_programs?$apply=groupby((sensei_portfolio/sensei_portfolioid),aggregate(sensei_msdyn_project_effortcompleted%20with%20sum%20as%20total))",
                                      "aggregationValueFieldName": "total",
                                      "aggregationIdFieldName": "sensei_portfolio_sensei_portfolioid" } ],
                          "right": [ { "fieldName": "sensei_msdyn_project_effort" },
                                    { "aggregationUrl": "/api/data/v9.0/sensei_programs?$apply=groupby((sensei_portfolio/sensei_portfolioid),aggregate(sensei_msdyn_project_effort%20with%20sum%20as%20total))",
                                      "aggregationValueFieldName": "total",
                                      "aggregationIdFieldName": "sensei_portfolio_sensei_portfolioid" } ] } ]
    },
    { "displayName": "Proposals",
      "entityName": "sensei_proposal",
      "viewName": "All Active Proposals",
      "hideStatus": true,
      "securityRoleIds": [ "d97d1f3f-8f4c-ea11-a812-000d3a7981c7" ]
    }
]
Adding a field
TODO:
- Add Field to Entity
- Add field to Form
Adding a Project Type (EPT)
TODO: Adding an EPT and setting tab visibility
Adding a Workflow
Custom Workflows can be added to Sensei.IQ, but there are some important steps required to make them function as expected within IQ.
Create a new Business Process Flow (BPF)
- Navigate from the cog menu in PowerApps to Advanced Settings
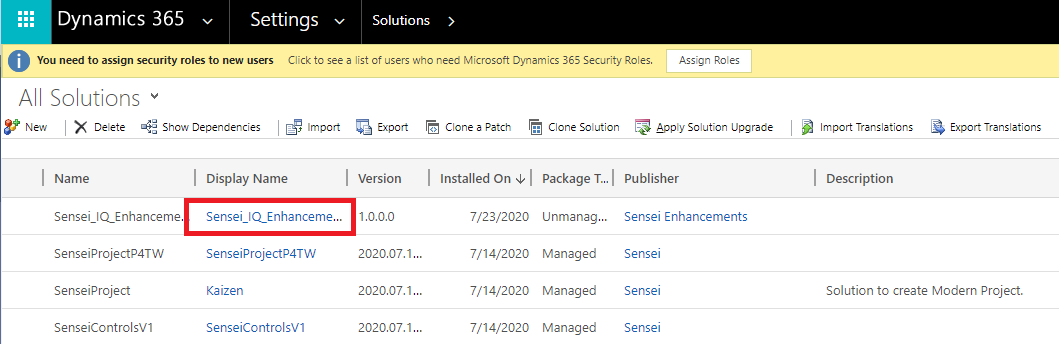
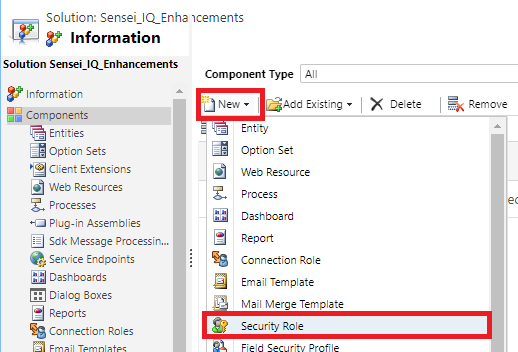
- From the Dynamics 365 Settings menu, select Solutions
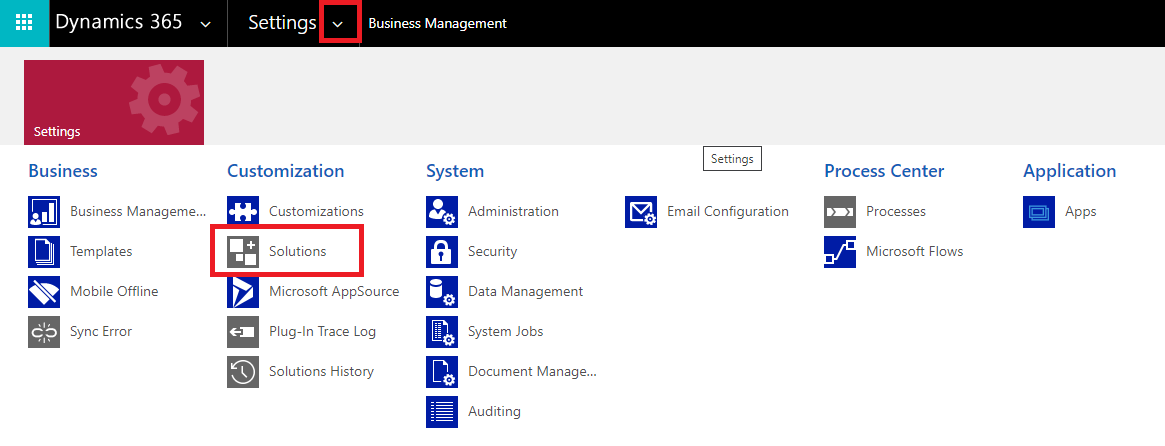
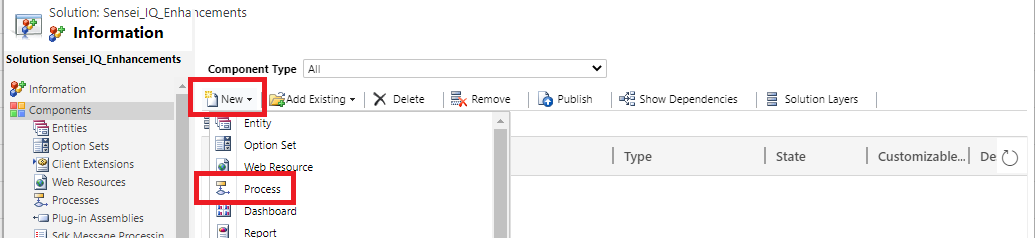
- Select the Sensei_IQ_Enhancements unmanaged Solution that contains the Enhancements for IQ in your environment.
- Select the New button and then select Process
- Enter a name for your Process, then ensure the following options are selected:
| Field | Value |
|---|---|
| Process name: | {Name of your BPF} |
| Category: | Business Process Flow |
| Entity: | Project |
| Business Process Type: | Run process as a business flow (Classic) |
| Name: | {Should be automatically entered for you when you enter the Process name. Adjust if required.} |
Once you have entered the details, press OK.
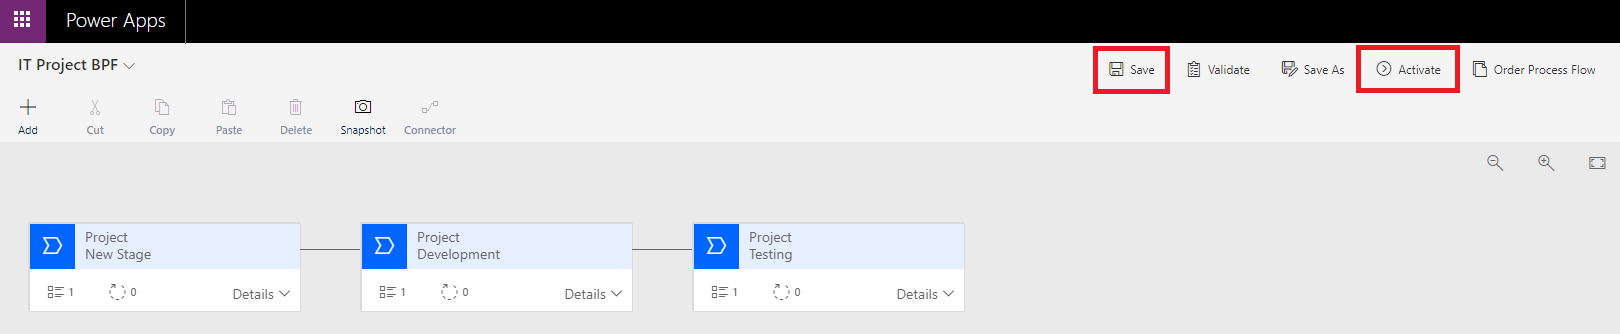
- Now that your BPF has been created, populate it as per your requirements. Once you are happy, Save and Activate your BPF.
- Back within the IQ Enhancements Solution in the Dynamics 365 Advanced Settings area, select to either edit an existing enhancement Security Role, or select to add a new one.
- If adding a new Role, provide a relevant Name and then select the Business Process Flows tab.
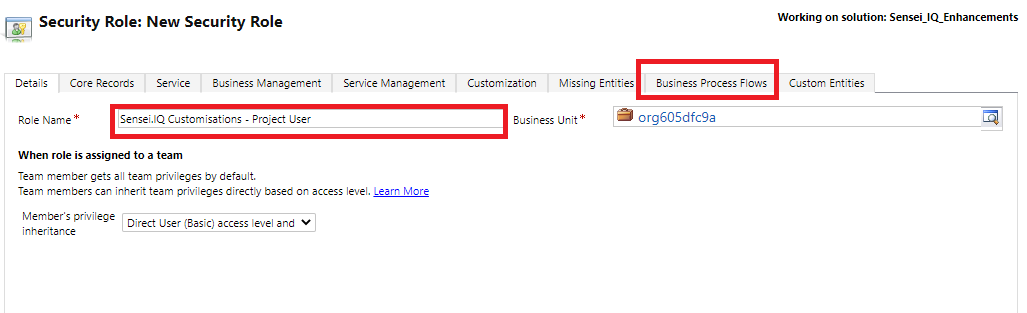
- Locate and select the Name of your Business Process Flow. The UI should update to provide security permissions to the role across the permission set.
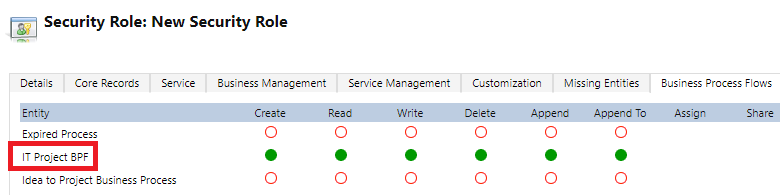
- Select Save and Close.
- Next, Navigate to the Sensei.IQ for Project app. (Note: You will need the Sensei.IQ for Admin User role to perform these actions)
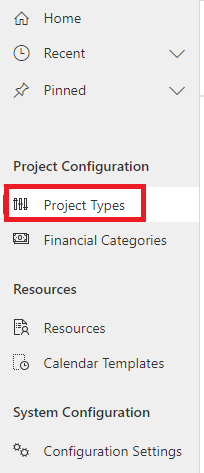
- Select the Settings area of the app
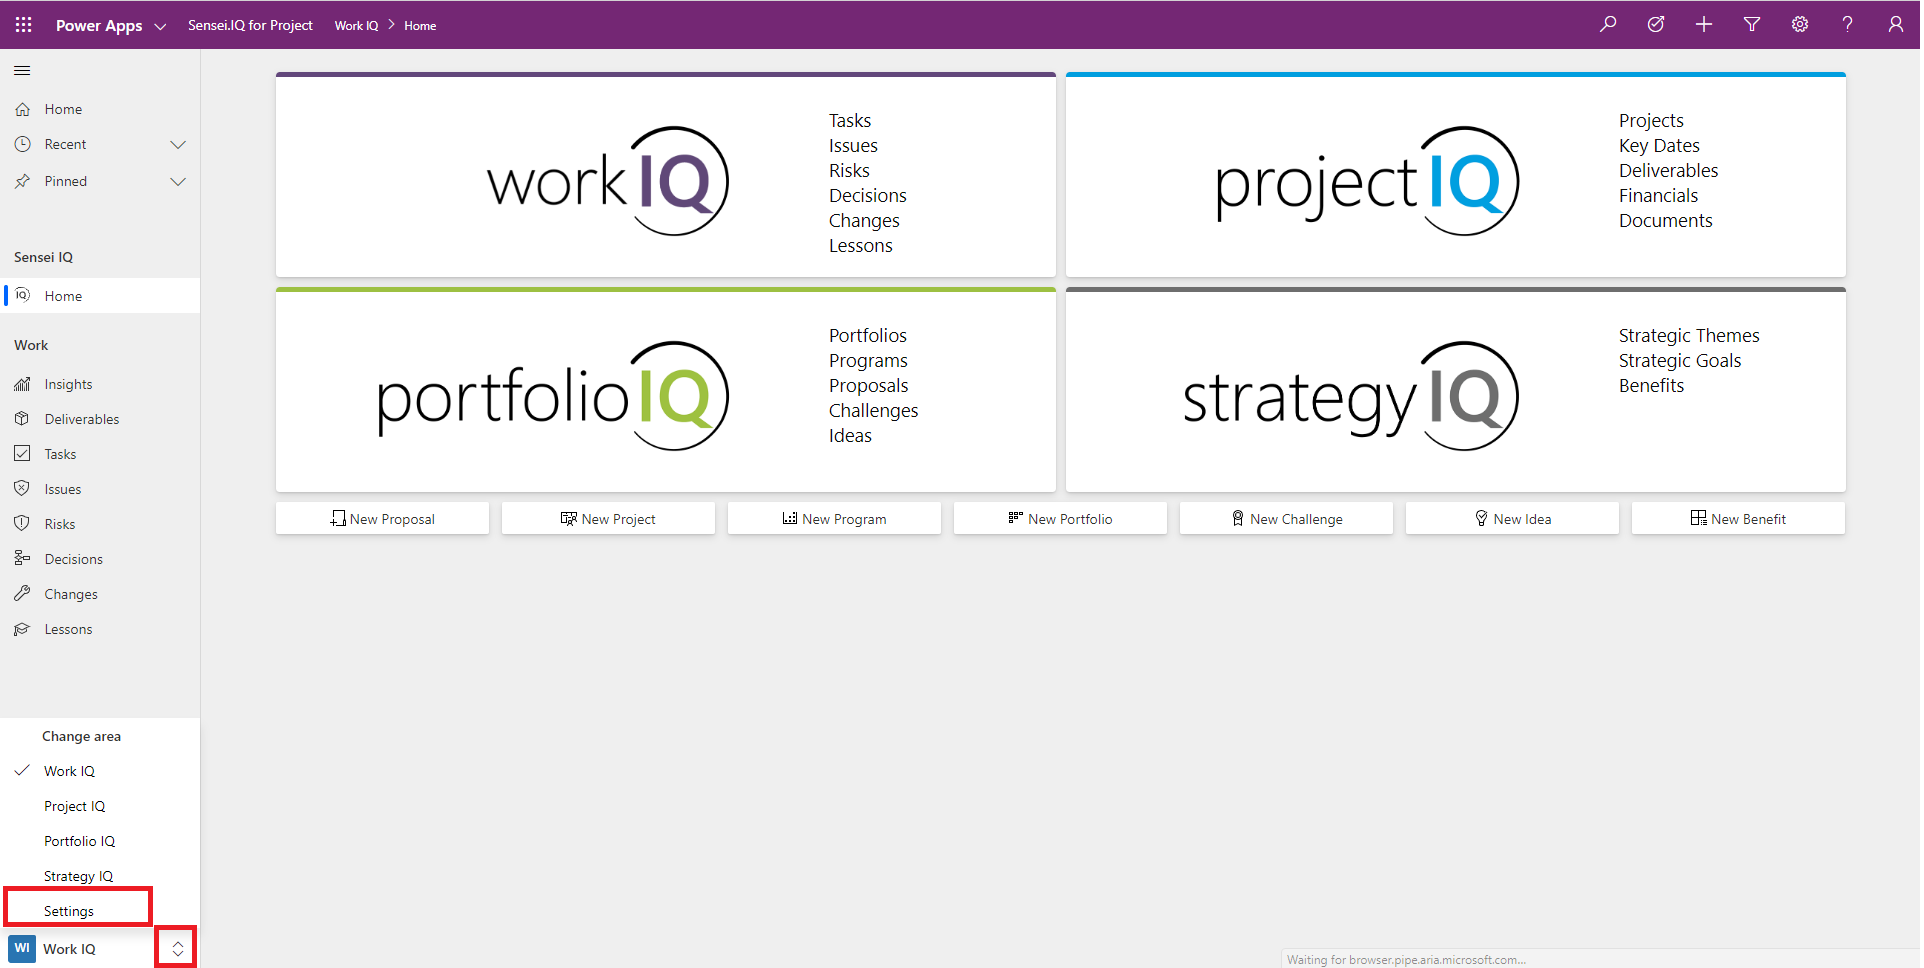
- Select Project Types from the left menu
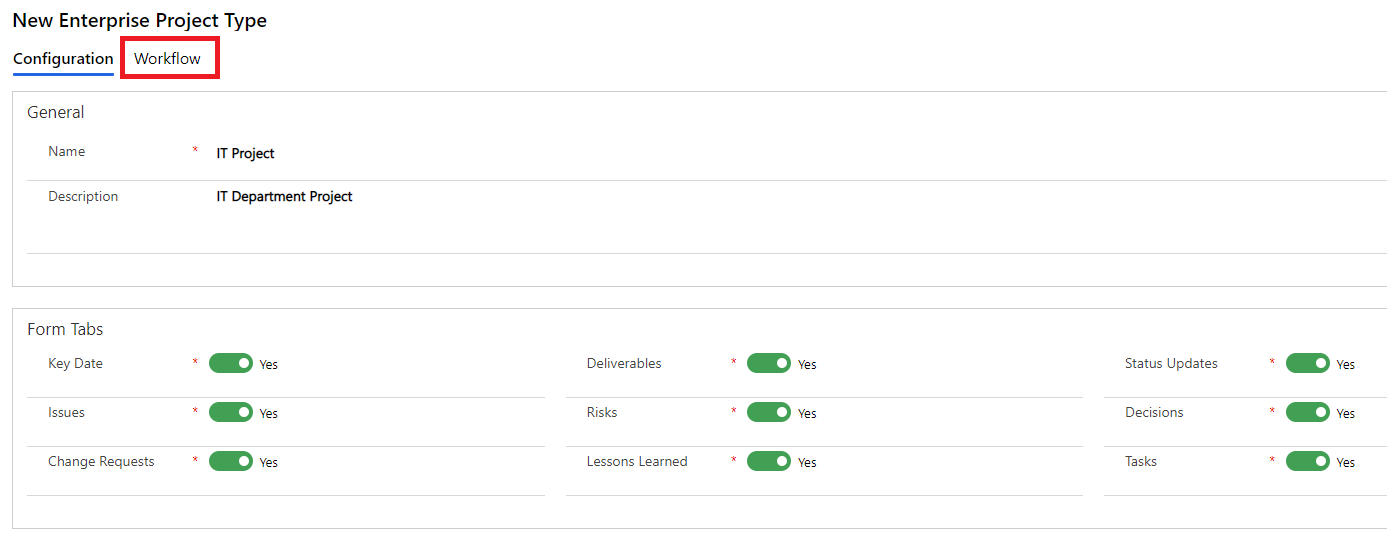
- Select to create a New Project Type (or select to edit an existing one, if you need to change its associated BPF Workflow)

- Enter the details for your new Project Type and the required tabs that you wish to display on the Project Form. Then select the Workflow tab on the Project Type form.
- In the Workflow field, search for and locate the BPF that you created earlier.
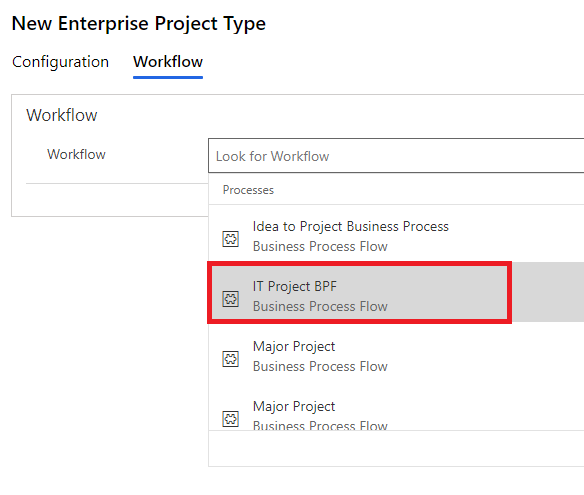
- Select Save & Close.
- Next, we need to make sure that the new BPF is available within the IQ app. Back within the IQ Enhancements Solutions in the Dynamics 365 Advanced Settings area, check whether the Sensei.IQ for Project model driven app is already part of your Enhancements Solution.
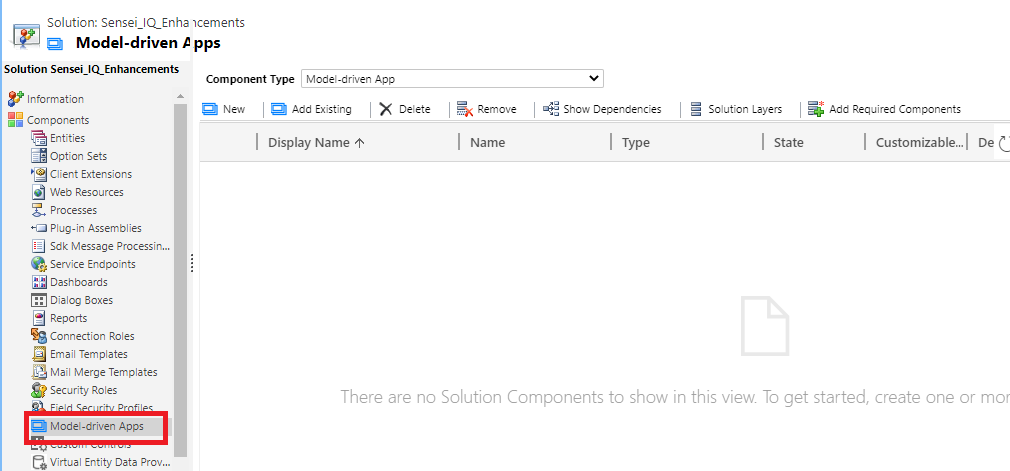
- If it is not yet added, use the Add Existing > Model Driven App option.
 and then select the Sensei.IQ for Project app and press OK
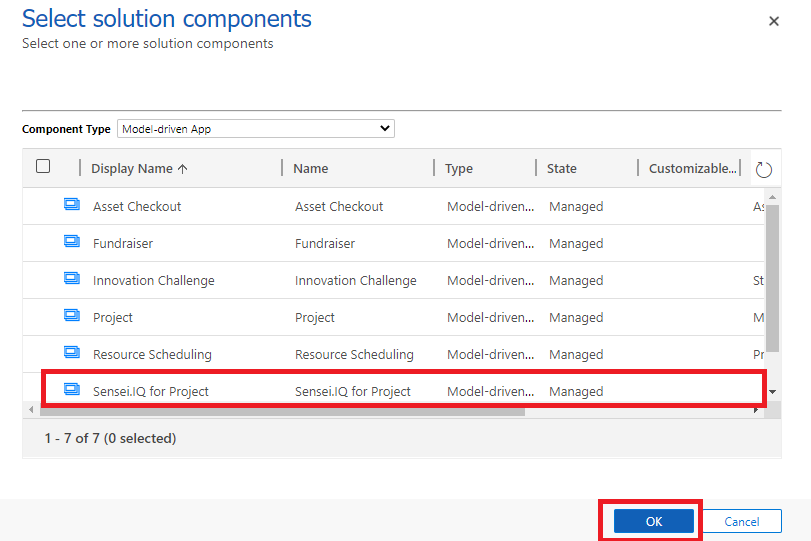
- Double-click the Sensei.IQ for Project model driven app to open it in Edit mode.
- In the App Designer, select the Business Process Flows object.
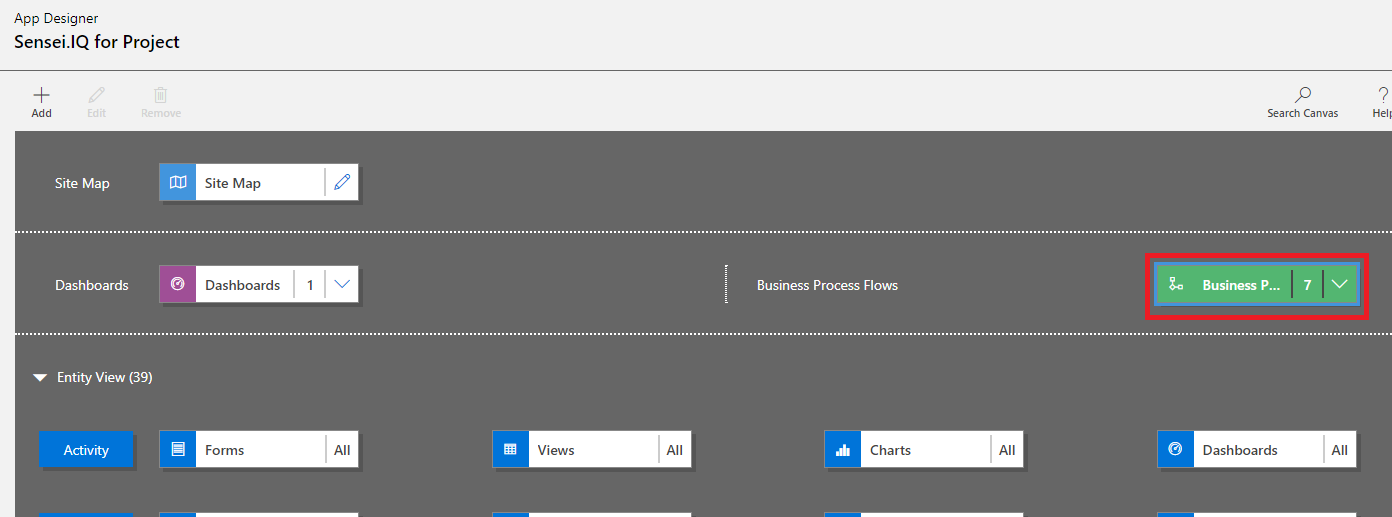
- In the list of BPFs that now appear in the right pane, select your new BPF
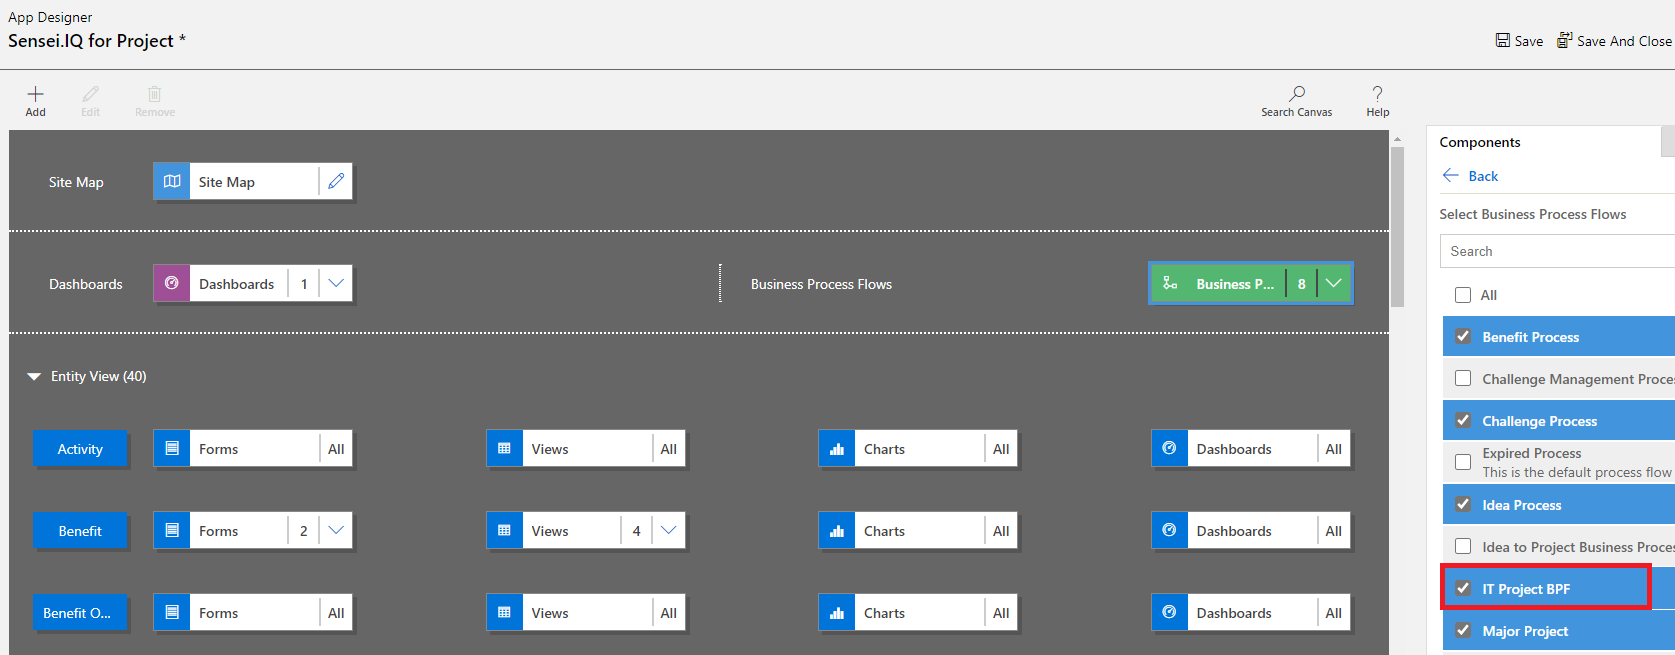
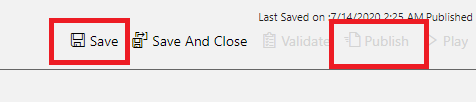
- Press Save and then Publish.
- Using the Dynamics Plugin Registration Tool, select to log in to your Environment
- Once connected to your environment, scroll down to locate the SenseiPlugin assembly
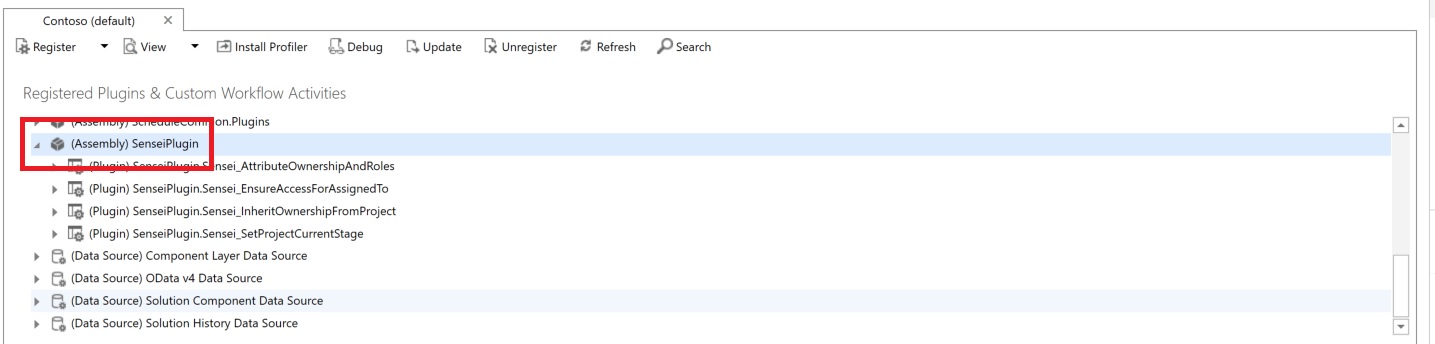
- Right-click (Plugin) SenseiPlugin.Sensei_SetProjectCurrentStage and select Register New Step

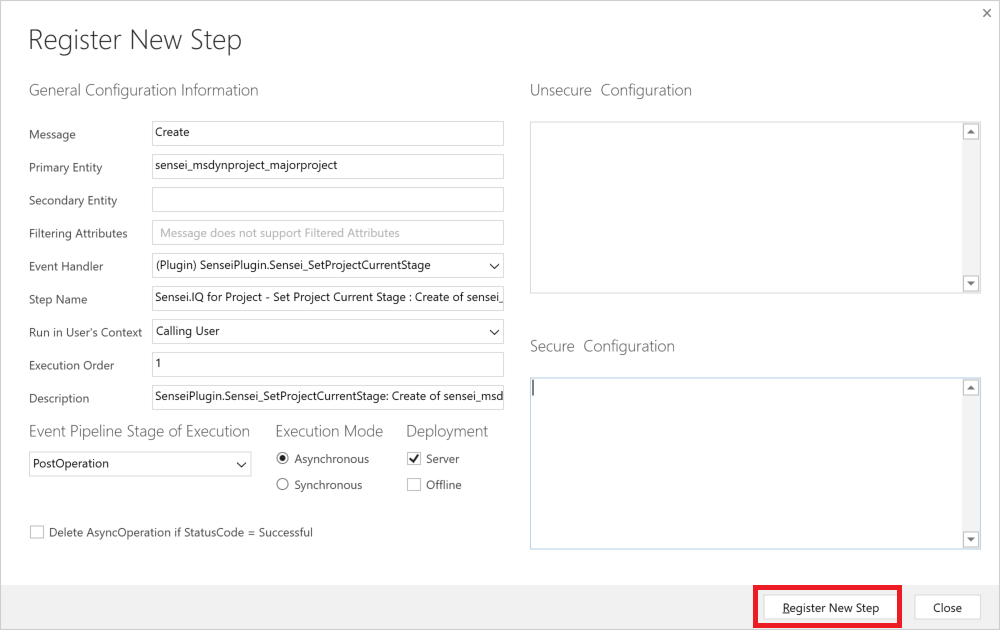
- Configure the Step with the following settings, then press Register New Step.
| Message | Create |
|---|---|
| Primary Entity | { Select your BPF Entity } |
| Secondary Entity | {none} |
| Filtering Attributes | {none} |
| Event Handler | (Plugin) SenseiPlugin.Sensei_SetProjectCurrentStage |
| Step Name | Sensei.IQ for Project - Set Project Current Stage : Create of { Your BPF Entity Name } |
| Run in User's Context | Calling User |
| Execution Order | 1 |
| Description | SenseiPlugin.Sensei_SetProjectCurrentStage: Create of { Your BPF Entity Name } |
| Event Pipeline Stage of Execution | PostOperation |
| Execution Mode | Asynchronous |
| Deployment | Server |
| Delete AsyncOperation if StatusCode = Successful | Unchecked |
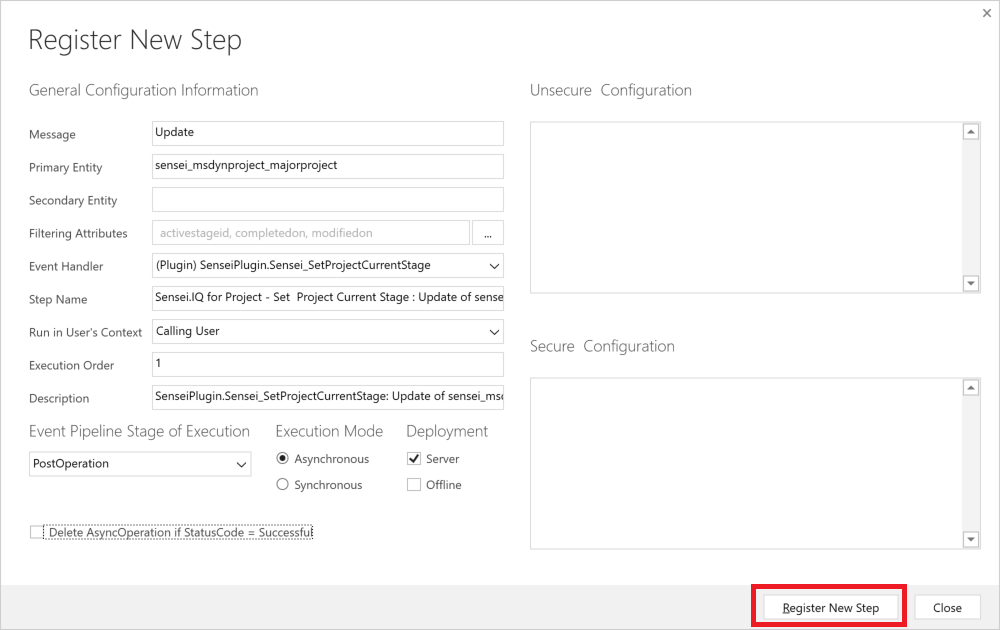
- Again Right-click '(Plugin) SenseiPlugin.Sensei_SetProjectCurrentStage' and select 'Register New Step' - this time we will add a handler for the Update operation
- Configure the Step with the following settings, then press 'Register New Step'
| Message | Update |
|---|---|
| Primary Entity | { Select your BPF Entity} |
| Secondary Entity | {none} |
| Filtering Attributes | activestageid, completedon, modifiedon |
| Event Handler | (Plugin) SenseiPlugin.Sensei_SetProjectCurrentStage |
| Step Name | Sensei.IQ for Project - Set Project Current Stage : Update of { Your BPF Entity Name } |
| Run in User's Context | Calling User |
| Execution Order | 1 |
| Description | SenseiPlugin.Sensei_SetProjectCurrentStage: Update of { Your BPF Entity Name } |
| Event Pipeline Stage of Execution | PostOperation |
| Execution Mode | Asynchronous |
| Deployment | Server |
| Delete AsyncOperation if StatusCode = Successful | Unchecked |
- After configuring these Plugin registration steps, whenever your BPF entity is used (e.g. when a Project moves from one stage to another) your Project will be updated with the Current Stage value.
- Your BPF should now work and display correctly within Sensei.IQ.

Unhiding a Command Bar Button
Various Command Bar buttons have been hidden from various Entities relating to the Sensei.IQ Solution. If there is a customer requirement to unhide any of these buttons, then the following procedure can be used:
- Create an Unmanaged Solution (if one does not already exist) in the customer environment and ensure you add to it the existing entities that you wish to modify the ribbon for.
- Open Ribbon Workbench 2016 (either as web add-on in Dynamics or from the XrmToolbox desktop application).
- Select Open Solution

- Select to open your unmanaged Solution containing the entities you wish to modify the ribbon for.
- Note: If Ribbon Workbench fails to load your Solution (because your Solution is large), try multiple times. Sometimes this error is transient.
- Once your Solution has loaded, ensure the Command Bar tab is selected
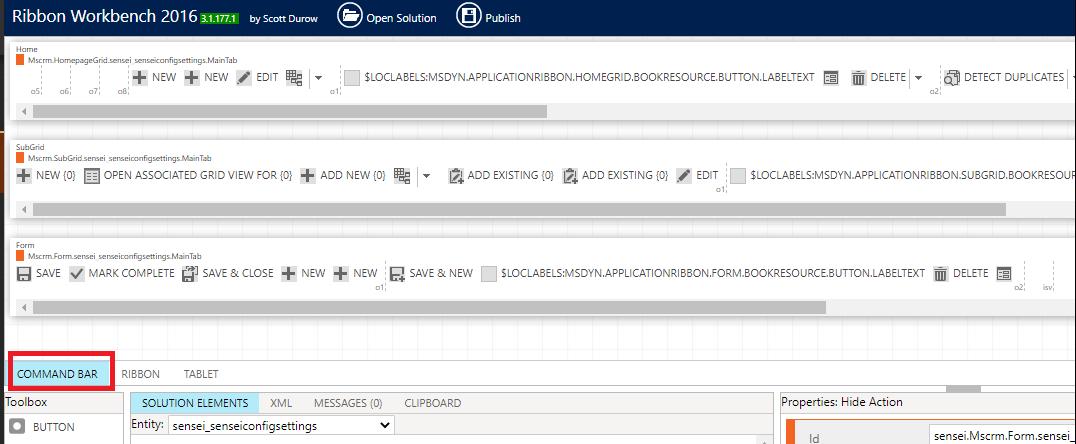
- Next, select the Entity that you wish to modify the ribbon for
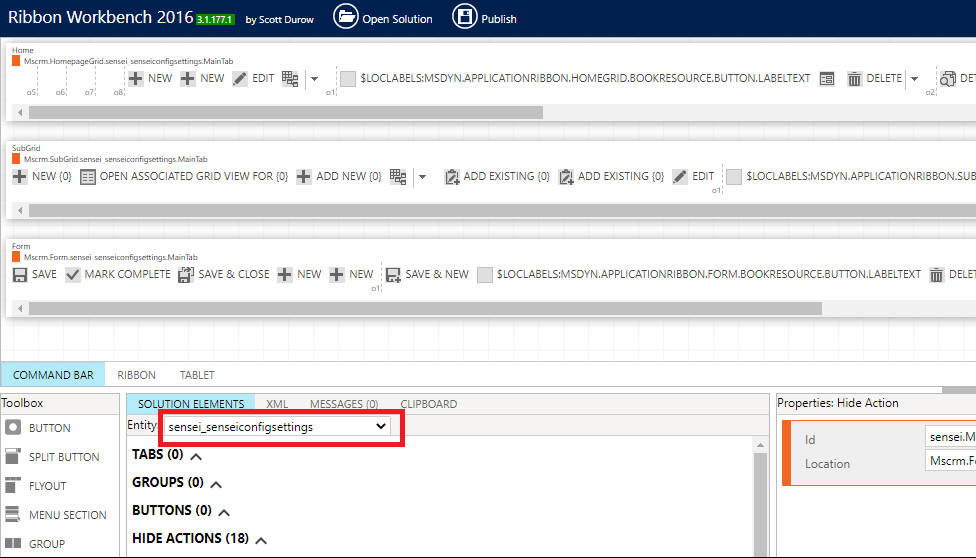
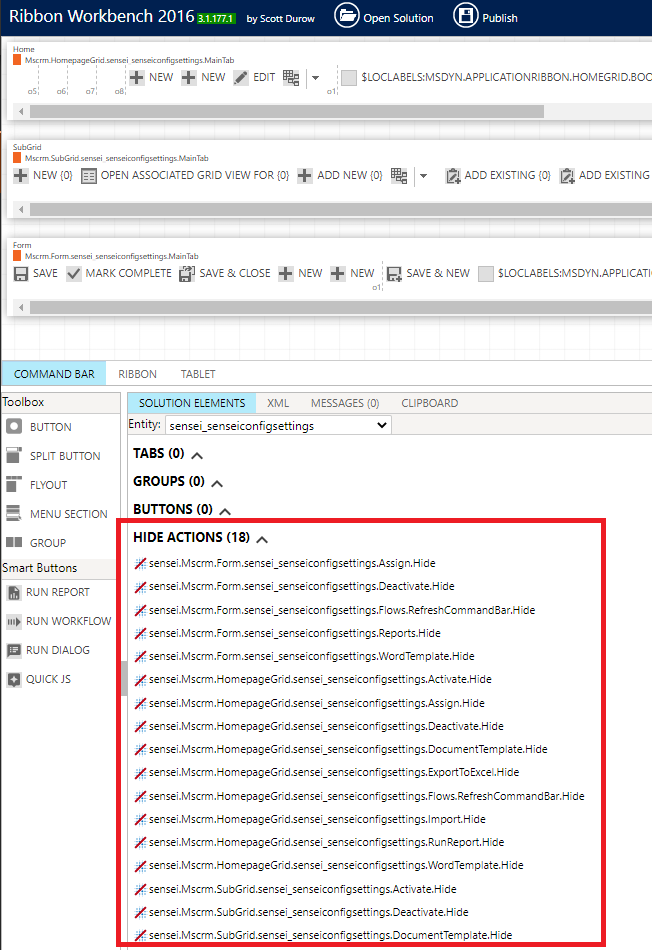
- Any buttons which have previously been hidden will be shown under the HIDE ACTIONS heading
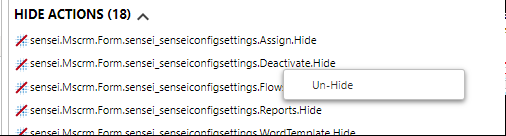
- To unhide a button, right-click the hide action that you wish to remove and select Un-Hide
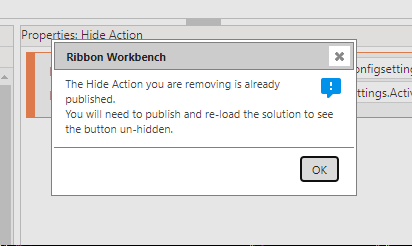
- Click OK on the notification. Take note that you will only see the unhidden button after a publish operation (and only in Ribbon Workbench after subsequently reloading the Solution).
- Make the required changes to whichever entities you wish to modify the command bar for.
- Once you have completed your changes, select Publish

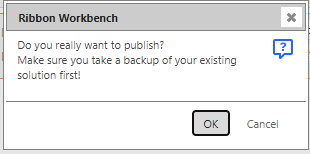
Click OK to confirm Publish operation.
Dealing with Custom Entities
As with all customisations to IQ, Sensei recommend creating an unmanaged Solution which will then contain your additions and modifications to IQ artefacts. Custom Entities are no different and should be created in your IQ Enhancements solution.
This section provides guidance on how to configure IQ to ensure that your custom entity is treated the same way as out of the box IQ entities in terms of security and in particular inheriting ownership from the Project, Program or Portfolio that your custom entity is associated with.
The following configuration steps assume that you will have already:
- Created your Custom Entity in your enhancements solution
- Added your Custom Entity to the Project, Program and/or Portfolio form(s) as a tab with a subgrid
- Created a custom Security Role which provides access to your custom entity
- Added your custom Security Role to the users who require it
- If associated to more than one parent type, we highly recommend creating a Business Rule to ensure that your custom entity records can only relate to one Project, Program or Portfolio at a time. (If you were to relate your custom record to a Project and to a Portfolio, the ownership of your entity record could have unexpected results).
If your custom entity contains Lookup fields to Project and/or Program and/or Portfolio, you will need to configure the Sensei Config Setting associated with each of those 'parent' entities to ensure IQ is aware of your custom entity.
- As an IQ Admin user, open the Sensei IQ for Project app and navigate to the Settings area.
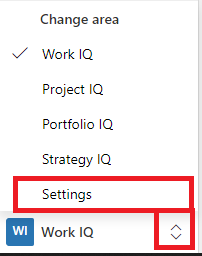
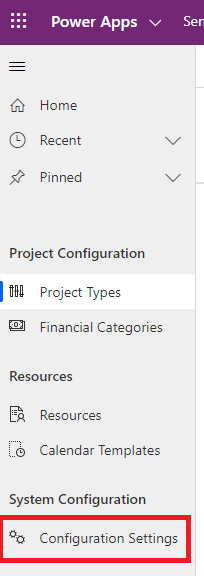
- From the left menu select Configuration Settings.
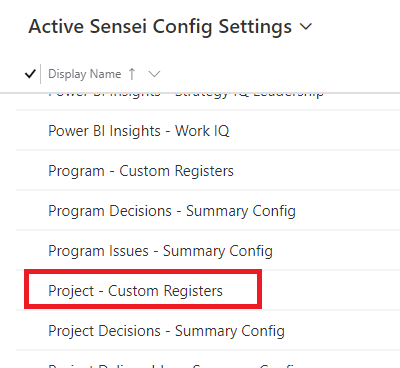
- Select the {Parent} - Custom Registers setting for the Parent of your custom entity. (Note: You will need to repeat these steps for each parent. e.g. if your custom entity relates to Projects and Programs, you will need to perform these steps for 'Project - Custom Registers' and 'Program - Custom Registers').
Note
If you do not see the corresponding settings item, switch to the Inactive Sensei Config Settings view, locate the setting and switch it to Active.
- Select the New Items button to add your new custom entity configuration.
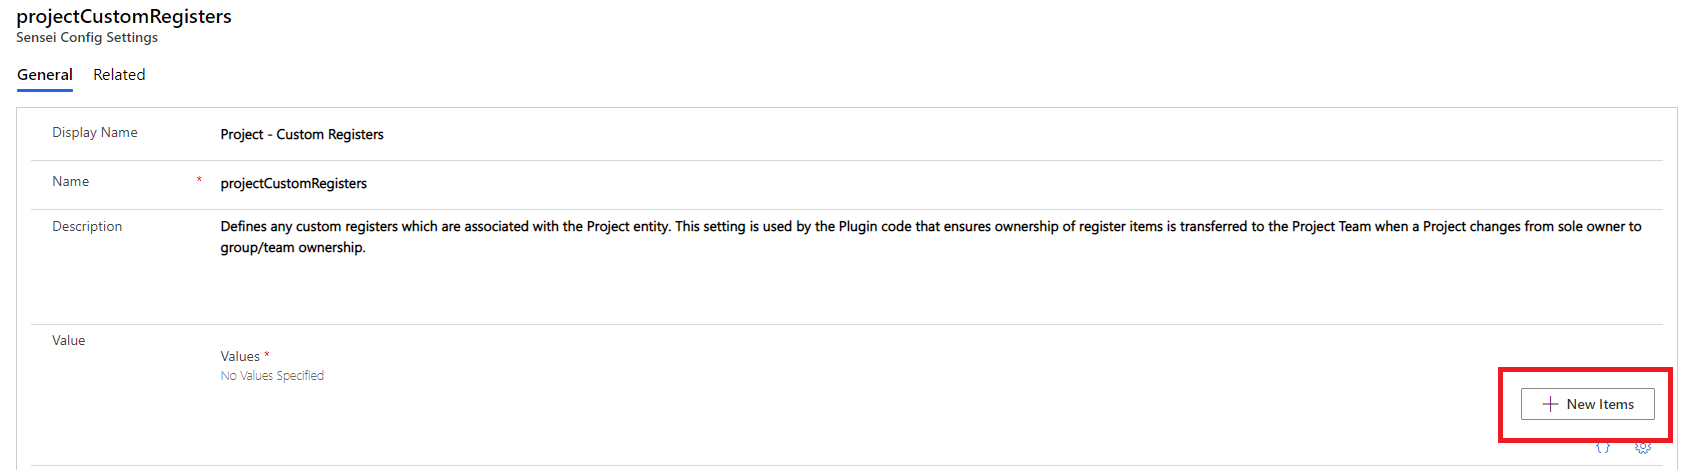
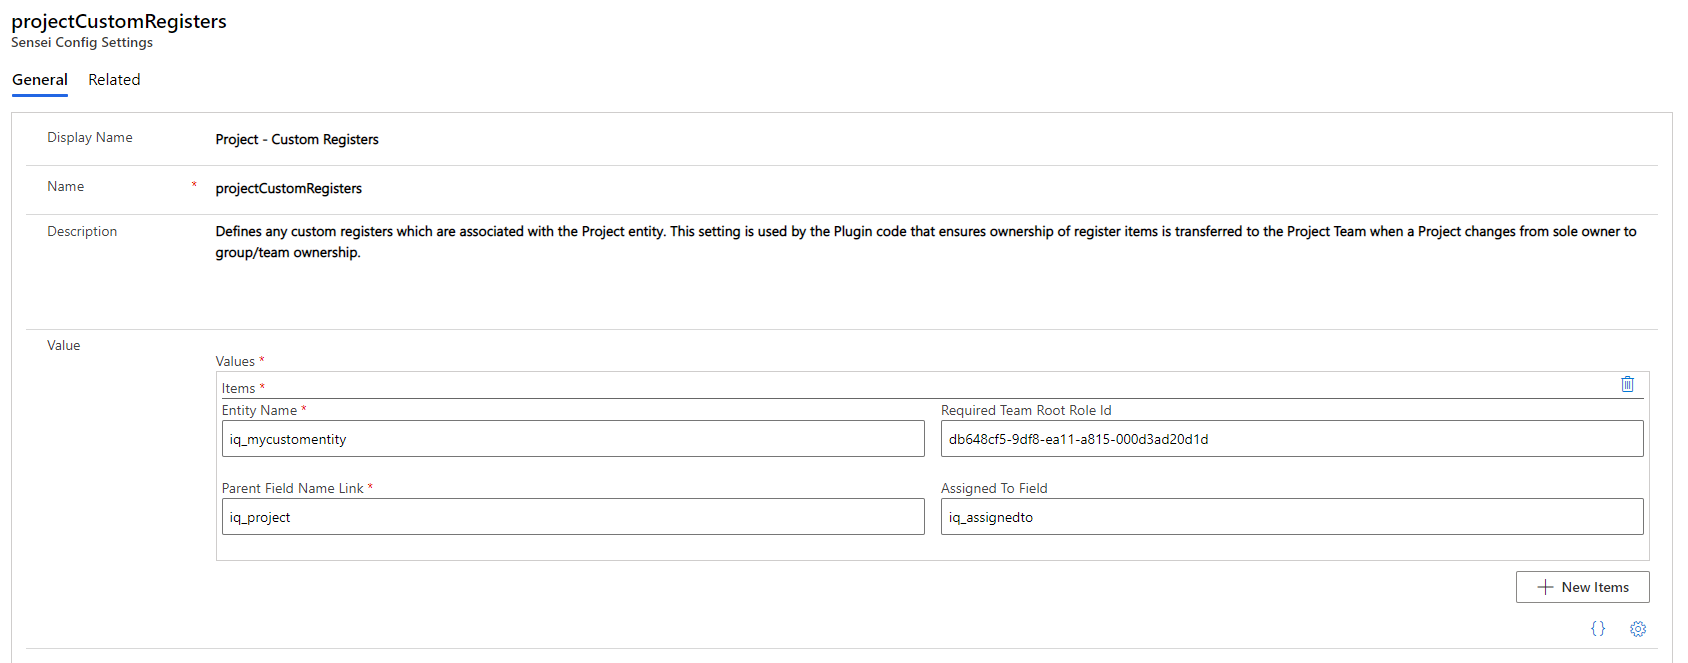
- Enter details relating to your custom entity to define:
- Entity Name: The internal name of your custom entity.
- Required Team Root Role Id: The Id of your custom security role (this role will be applied to any owner teams).
- Parent Field Name Link: The internal field name in your custom entity that relates the custom entity to its parent (in the case of a setting for Project - Custom Registers, this would identify the Project field).
- Assigned To Field: If your custom entity has an Assigned To type field, identify it by its internal name here.
- Save your Config Settings item
- Repeat these steps for each parent (Project, Program or Portfolio) that relates to your custom entity.
You will also need to perform these next steps to ensure that the Sensei IQ Plugin code is triggered to correctly run when you create or update a custom entity record. These Plugin steps ensure that your custom entity records will be visible to members of a Project, Program or Portfolio team (as applicable). To perform these steps, you will need to use the Plugin Registration Tool available here.
- Launch the Plugin Registration Tool (PluginRegistration.exe) and select Create New Connection.

- Ensure you select Office 365, then press Login.
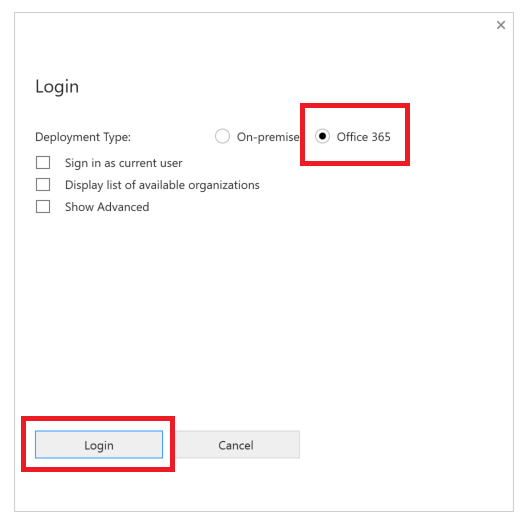
- Enter your credentials to log in to Office 365.
- In the list of Plugin Assemblies, locate (Assembly) SenseiPlugin and click the arrow to expand.
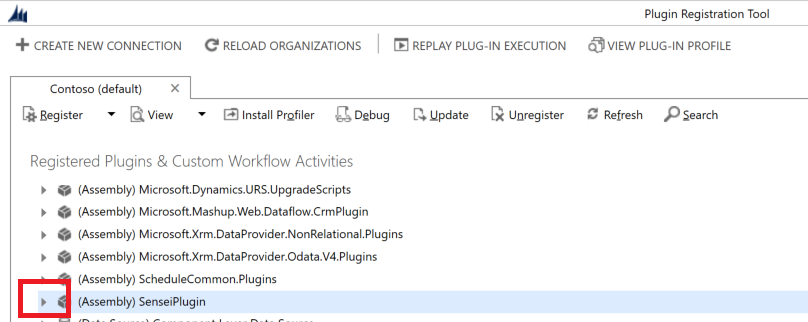
- Locate (Plugin) SenseiPlugin.Sensei_InheritOwnershipFromProject and right-click and select Register New Step.
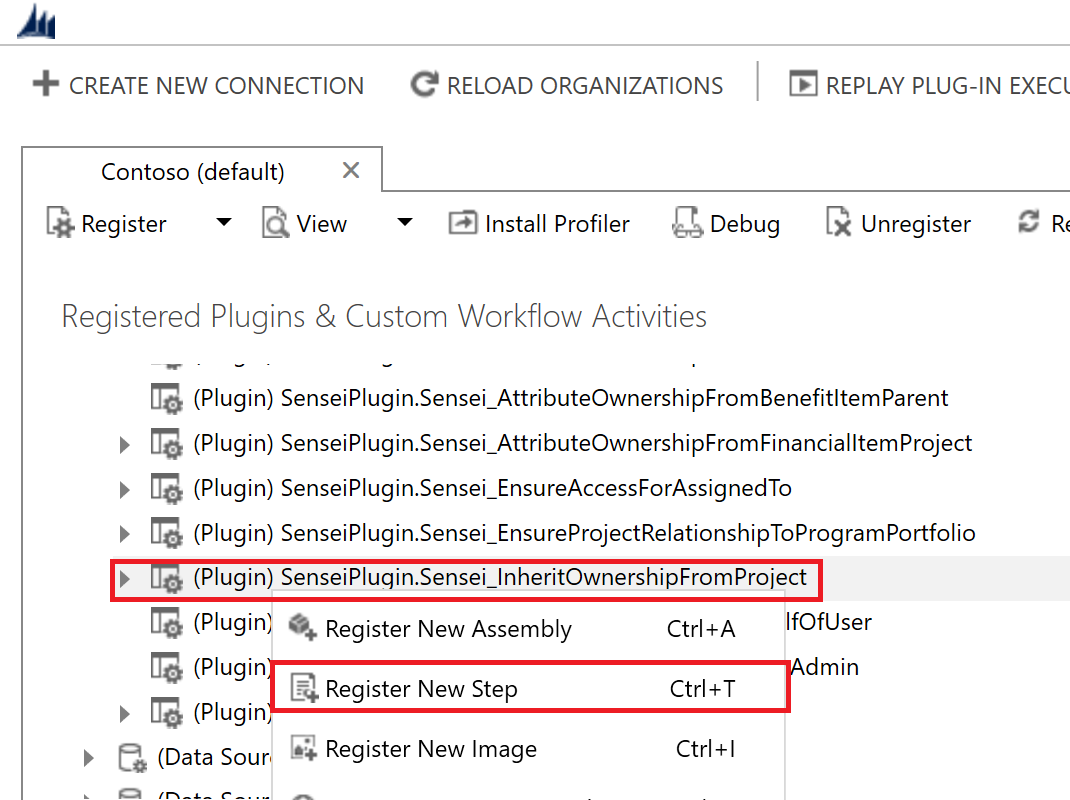
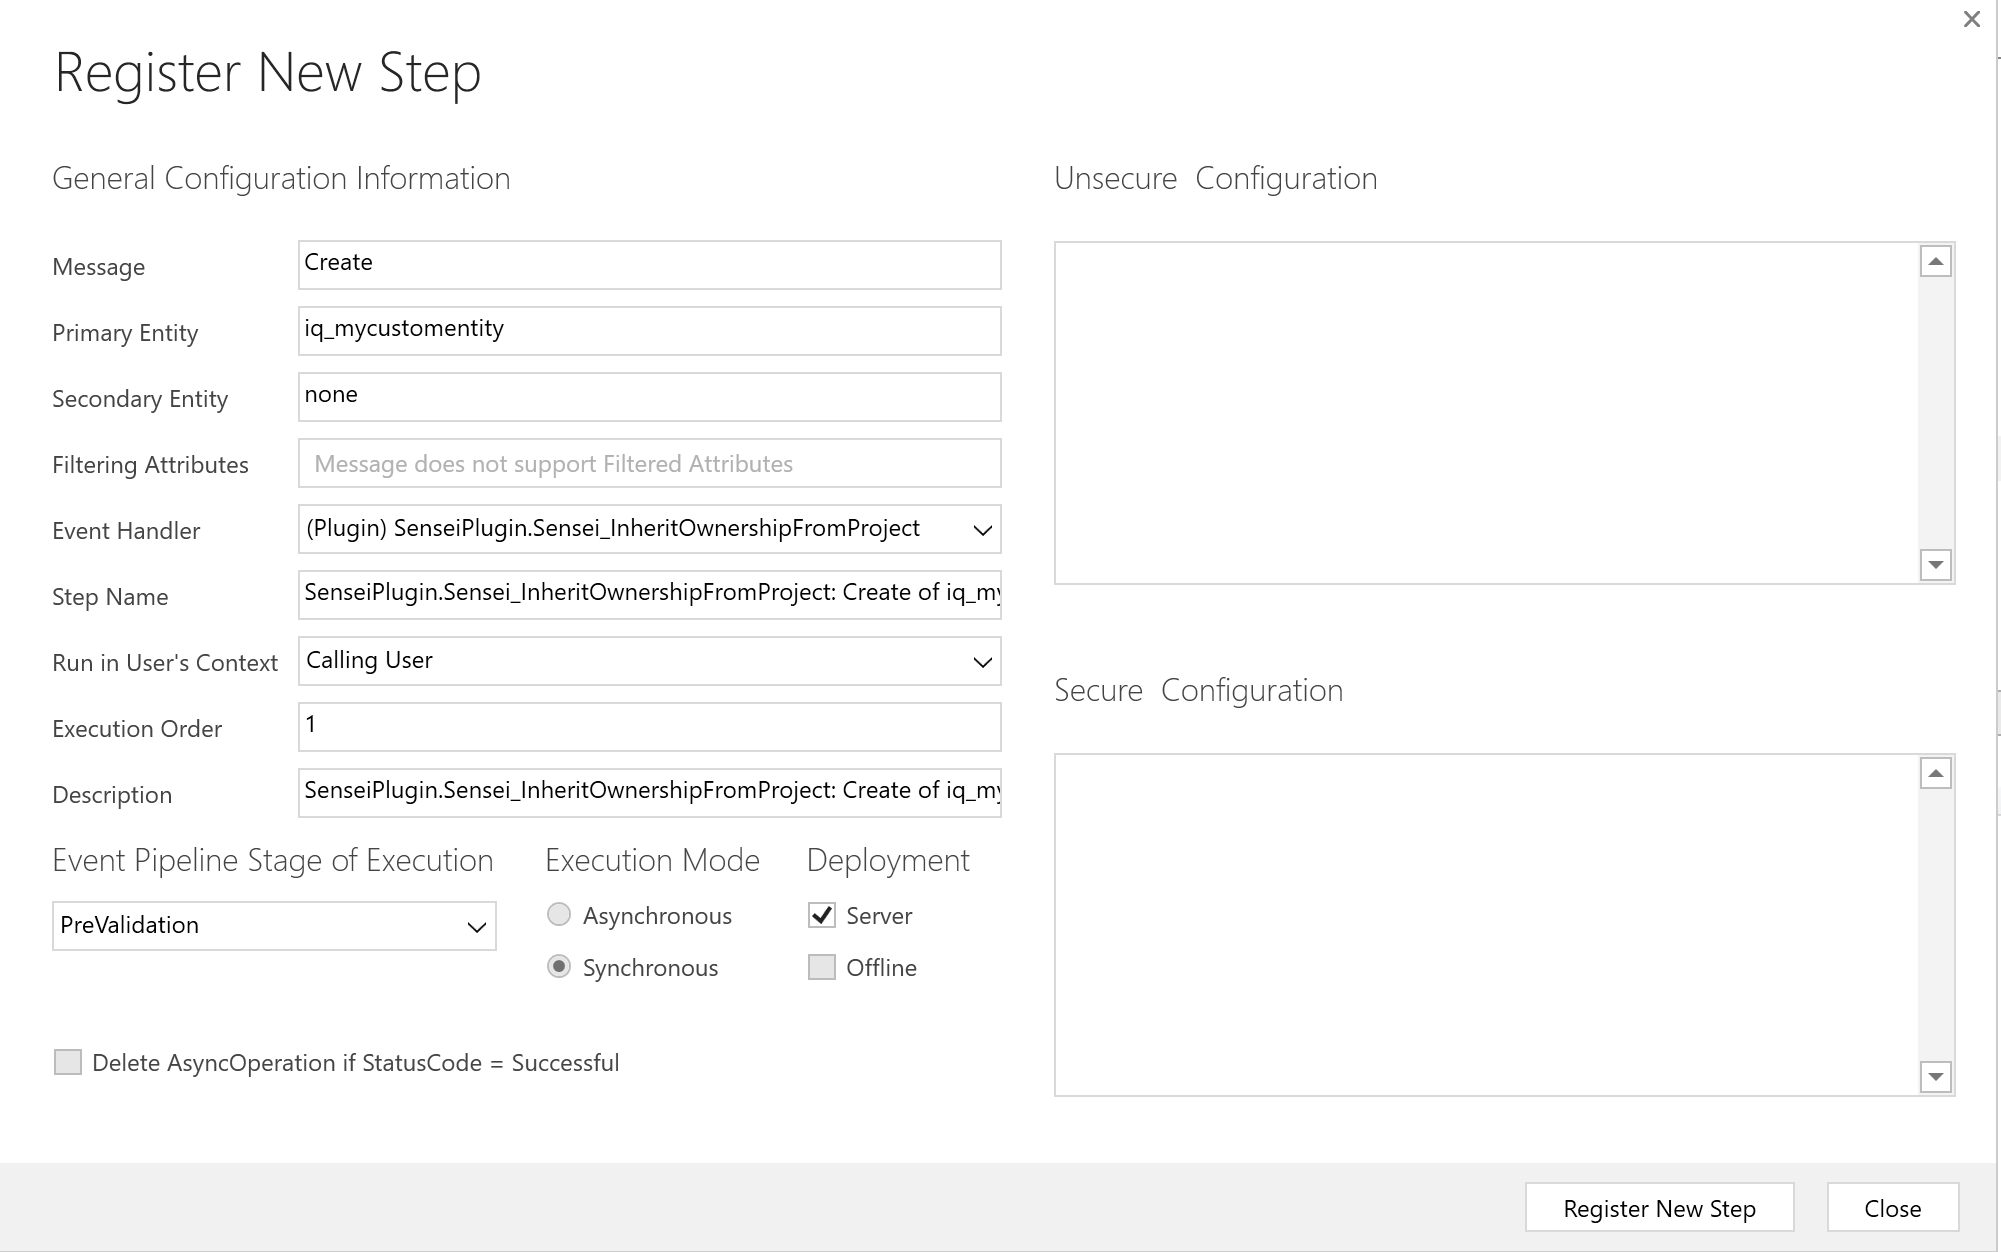
- Enter the following details, then press Register New Step. This will ensure that whenever a new record is created in your custom entity that the InheritOwnershipFromProject plugin code is run - which will ensure that your custom entity record is attributed the same ownership as the Project, Program or Portfolio that it is associated with.
- Message: Create
- Primary Entity: {Enter your custom entity by its internal name}
- Secondary Entity: {Leave blank}
- Filtering Attributes: {Leave blank - unavailable for a Create action}
- Event Handler: {Leave this set to (Plugin) SenseiPlugin.Sensei_InheritOwnershipFromProject}
- Step Name: {Add a name for your Plugin Step, or leave as per the default.}
- Run in User's Context: Calling User
- Execution Order: 1
- Description: {Add a description for your Plugin Step, or leave as per the default.}
- Event Pipeline Stage Of Execution: PreValidation
- Execution Mode: Synchronous
- Deployment: Server
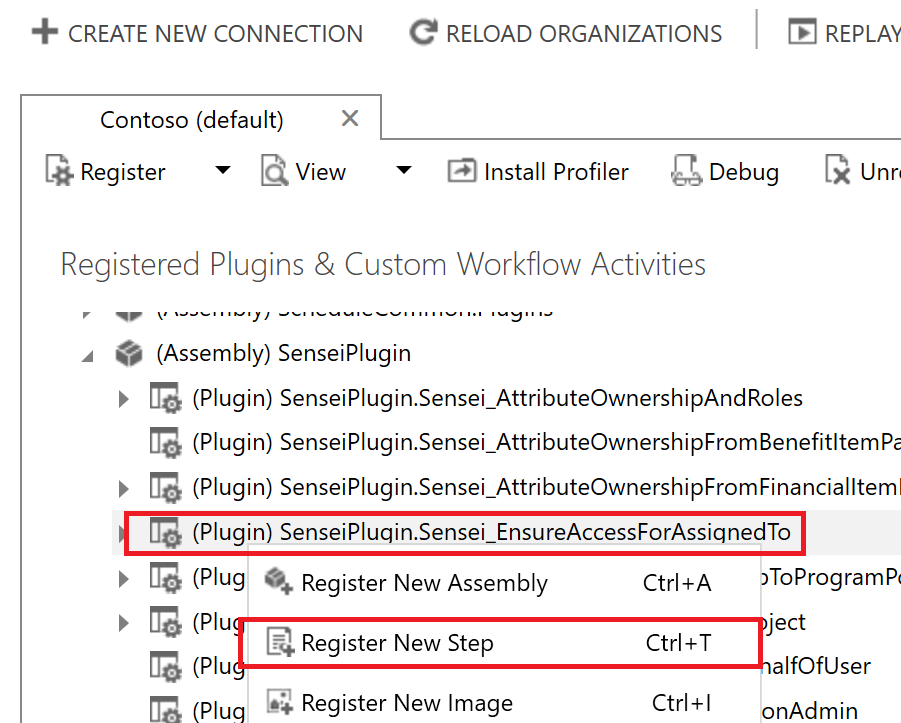
- Perform the following steps only if your custom entity has an Assigned To field which you have defined in the configuration settings. These steps ensure that if the person you have assigned to your entity record is not part of the Project/Program/Portfolio team, then the individual custom entity record will be shared with that person as an individual.
- From the Plugin Registration Tool, right-click (Plugin) SenseiPlugin.Sensei_EnsureAccessForAssignedTo and select Register New Step.
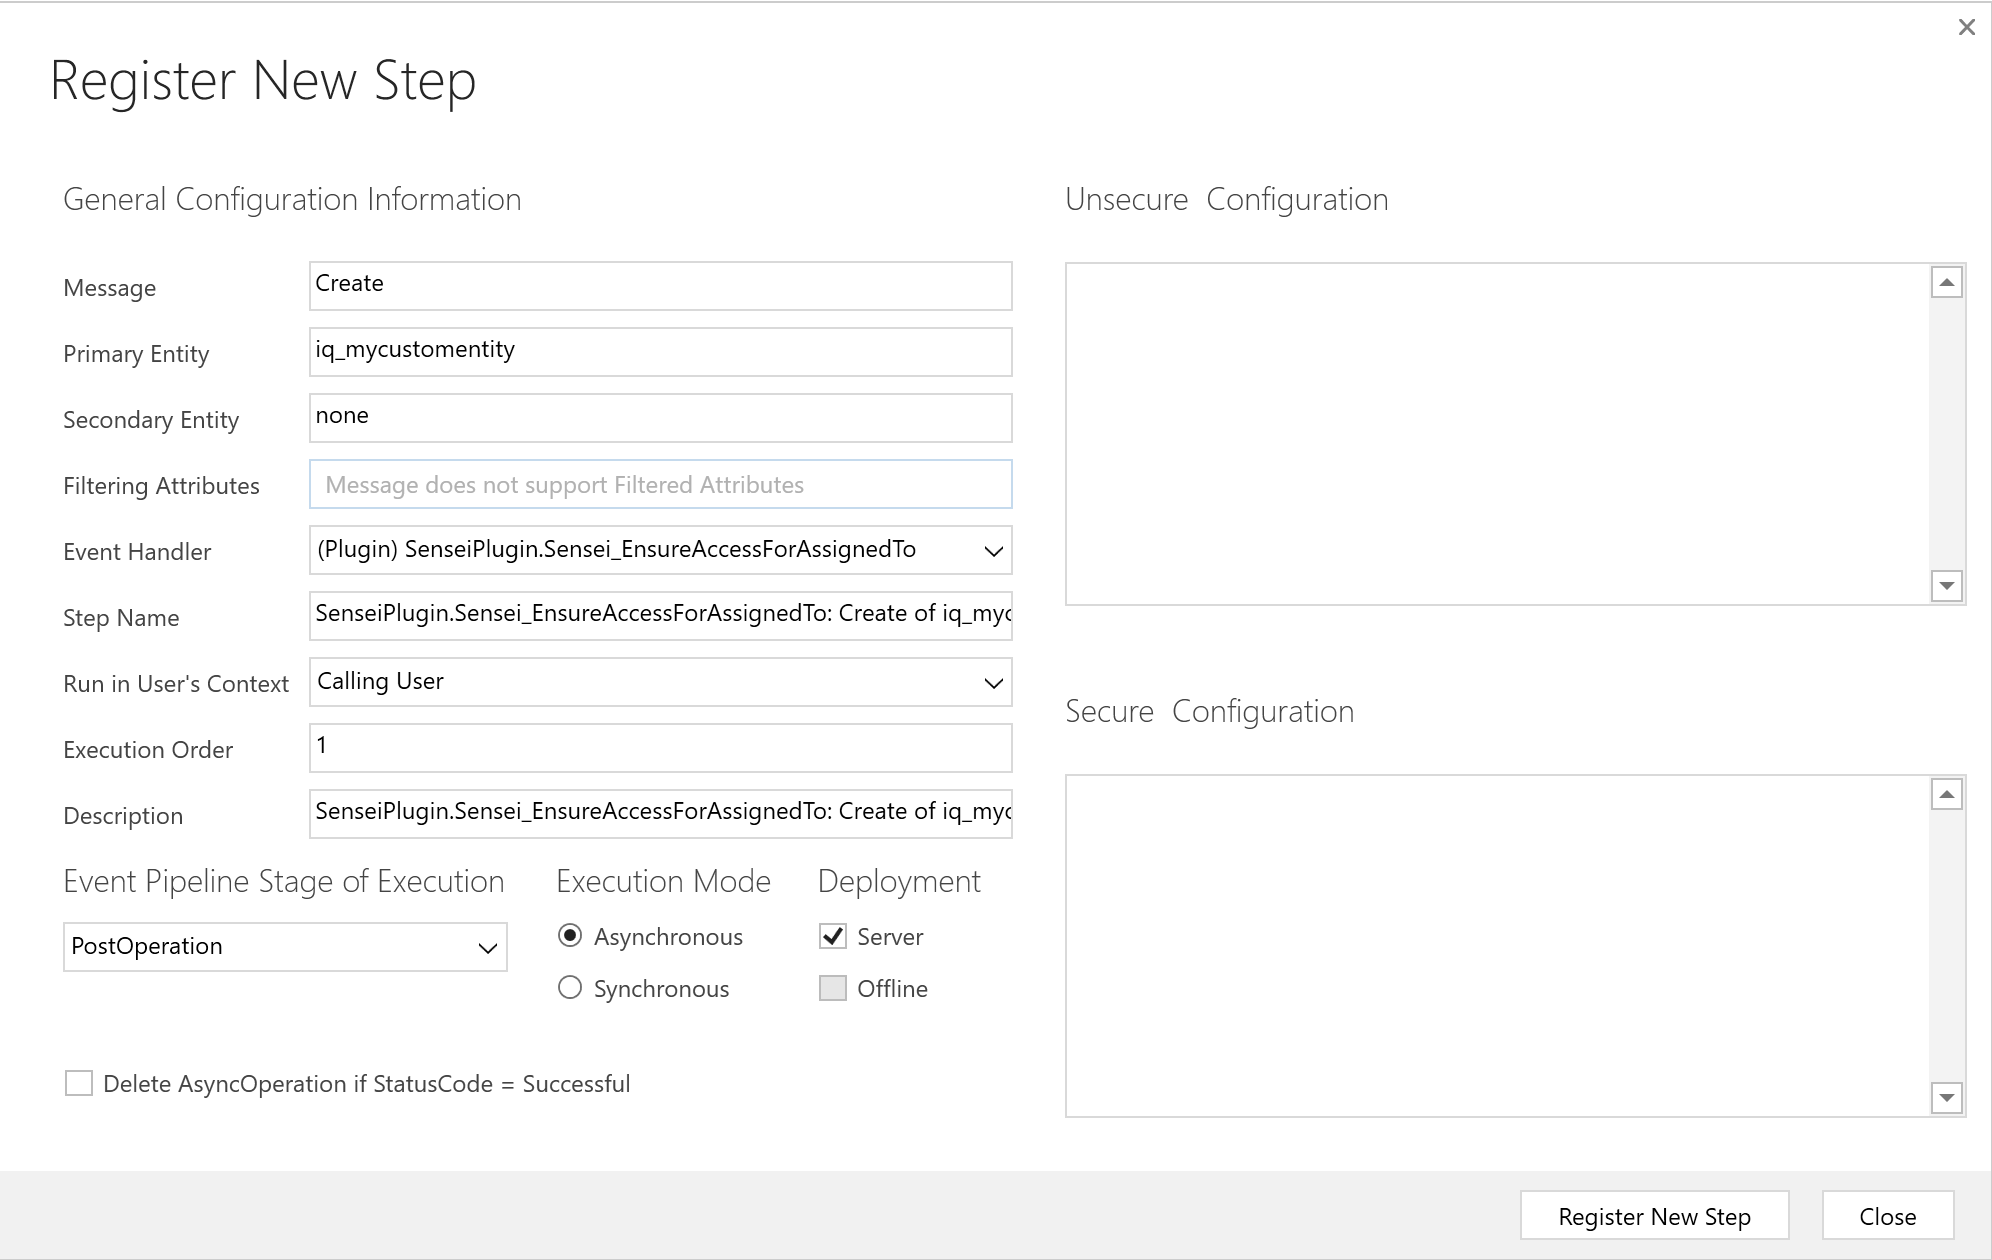
- Enter the following details, then press Register New Step.
- Message: Create
- Primary Entity: {Enter your custom entity by its internal name}
- Secondary Entity: {Leave blank}
- Filtering Attributes: {Leave blank - unavailable for a Create action}
- Event Handler: {Leave this set to (Plugin) SenseiPlugin.Sensei_EnsureAccessForAssignedTo}
- Step Name: {Add a name for your Plugin Step, or leave as per the default.}
- Run in User's Context: Calling User
- Execution Order: 1
- Description: {Add a description for your Plugin Step, or leave as per the default.}
- Event Pipeline Stage Of Execution: PostOperation
- Execution Mode: Asynchronous
- Deployment: Server
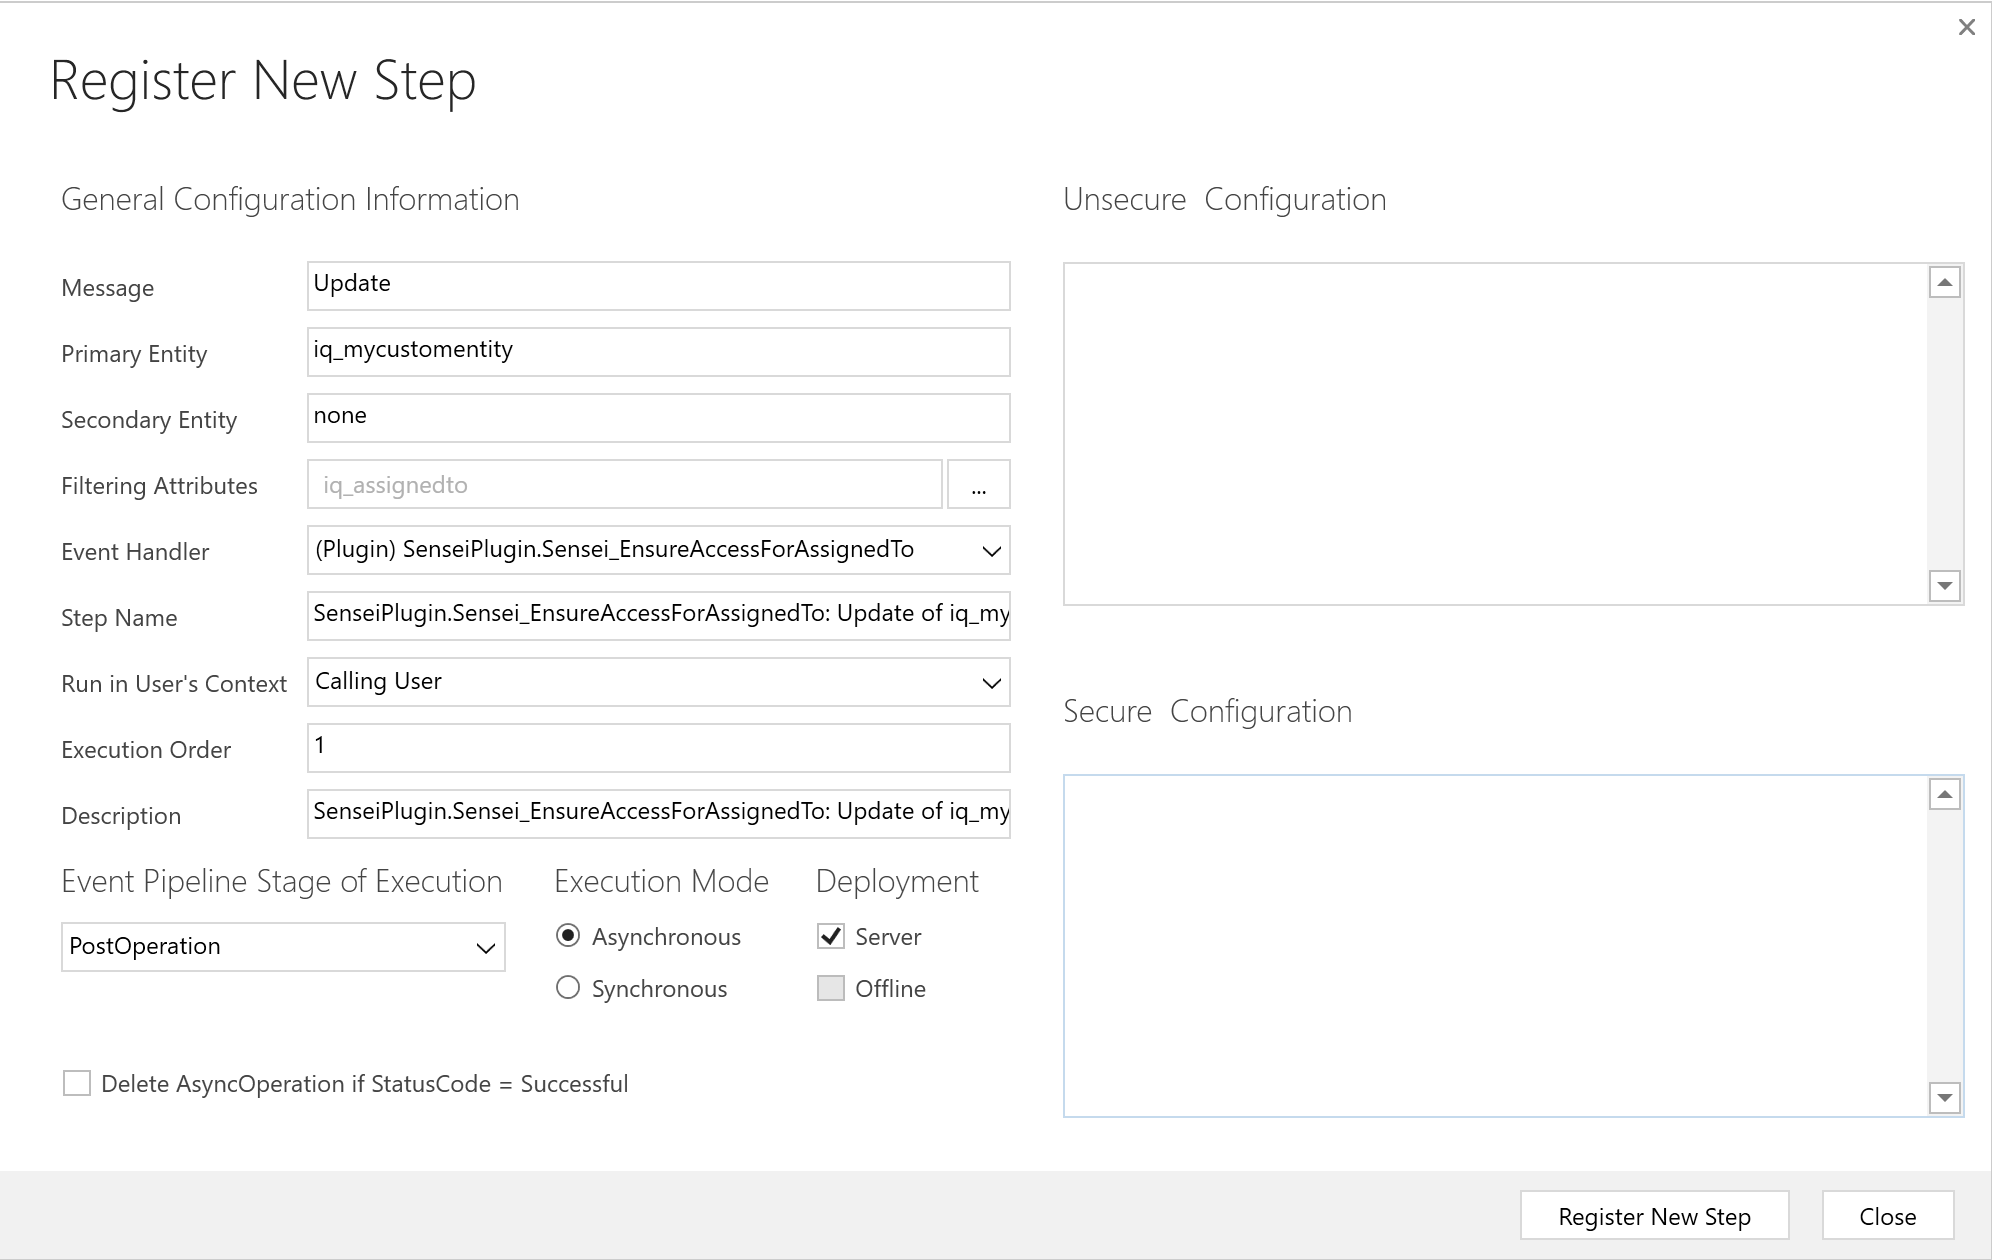
- Again right-click (Plugin) SenseiPlugin.Sensei_EnsureAccessForAssignedTo and select Register New Step.
- Enter the following details, then press Register New Step.
- Message: Update
- Primary Entity: {Enter your custom entity by its internal name}
- Secondary Entity: {Leave blank}
- Filtering Attributes: {Select your Assigned To field}
- Event Handler: {Leave this set to (Plugin) SenseiPlugin.Sensei_EnsureAccessForAssignedTo}
- Step Name: {Add a name for your Plugin Step, or leave as per the default.}
- Run in User's Context: Calling User
- Execution Order: 1
- Description: {Add a description for your Plugin Step, or leave as per the default.}
- Event Pipeline Stage Of Execution: PostOperation
- Execution Mode: Asynchronous
- Deployment: Server
- Delete AsyncOperation if StatusCode = Successful: {Uncheck}
Updates
Sensei IQ is a SaaS (Software as a Service) offering, providing a solution that processes customer data entirely within the confines of the customer Office 365 environment. As a SaaS product Sensei IQ also receives updates and fixes over time to add additional features and keep the product synchronised with the features and capabilities of the underlying Cloud platform which is also changing.
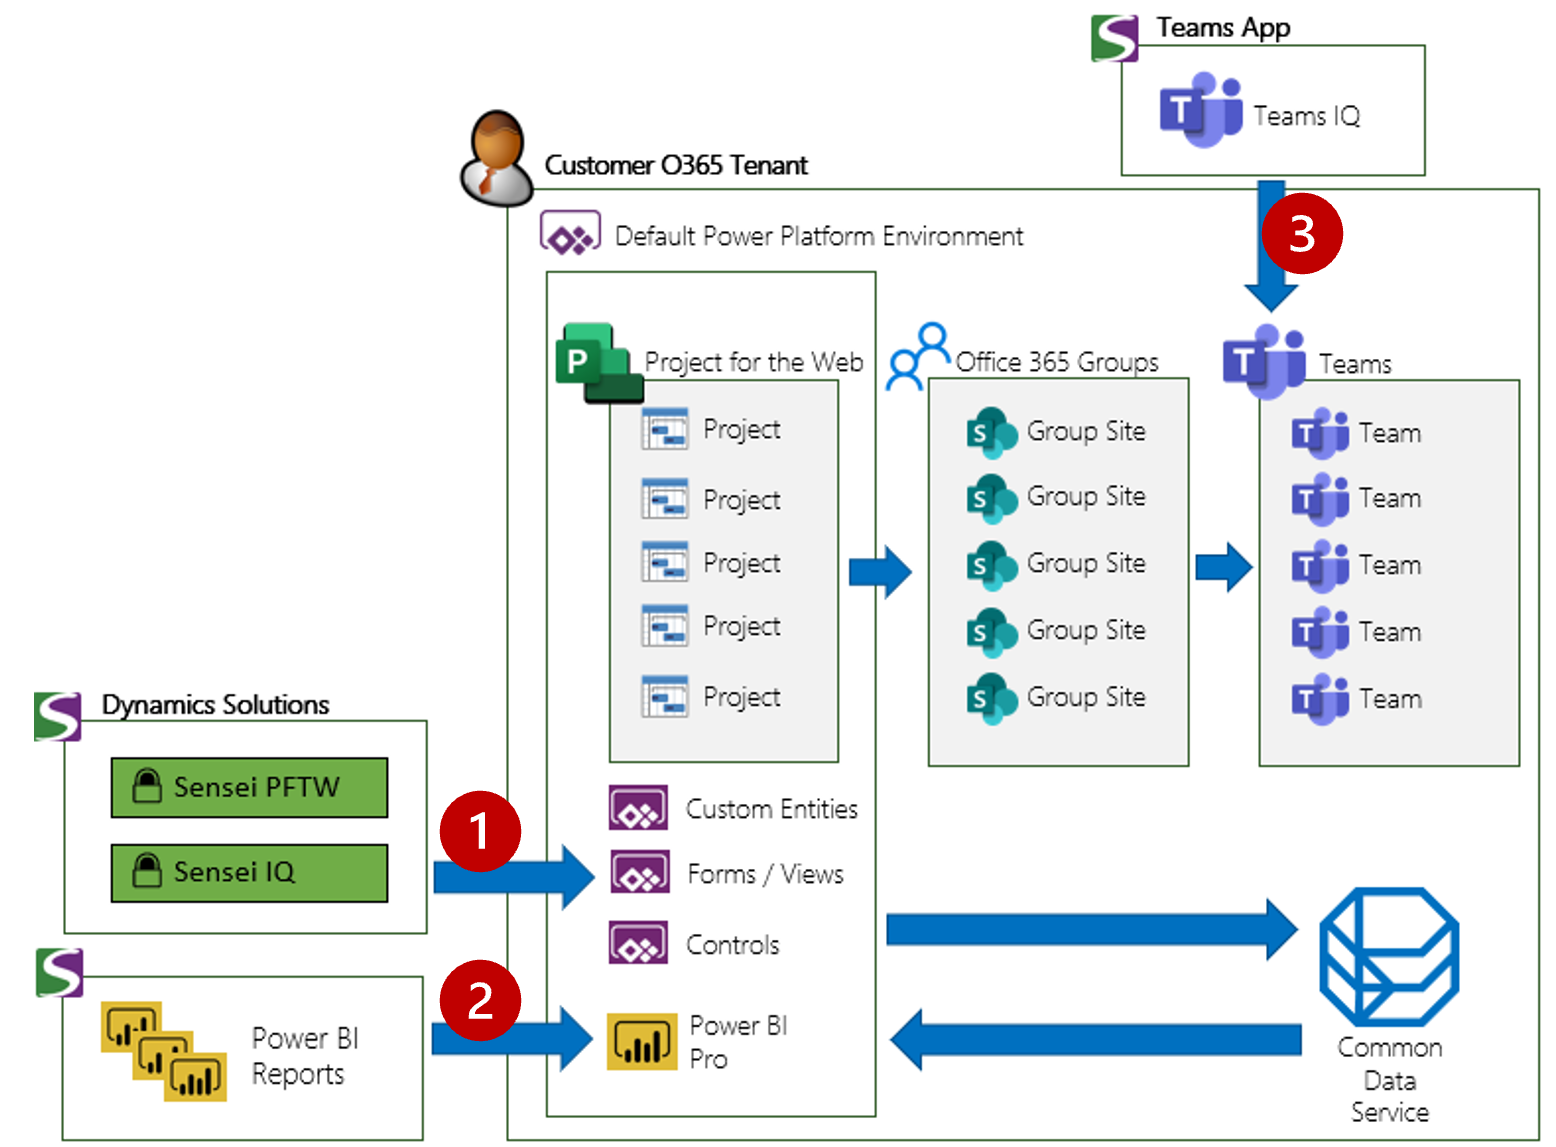
Updates are delivered in the following ways
- The Sensei Dynamics Managed Solutions are updated via the Sensei Deployment Service Principal consented to in Technical Readiness. This Service Principal is granted administrative access to the Default Power Platform environment in order to stage and update the Dynamics Solutions layers that are used by the Power Platform to provide the application.
- Power BI Reports. Updates to the Power BI reports could be applied manually via the deployment account (while it remains activated) or by appointment at a later time. Power BI Reports are likely to be customised as part of the initial engagement, so updating them at a later time is deemed an unlikely event.
- The Teams IQ App is delivered as a series of static assets from our CDN at https://teams-iq.sensei.cloud. Updates will be provided as necessary by securely updating content at the CDN endpoint.
Release Strategy
With regards to the Dynamics Solutions updates (pictured as 1 above) the release cadence is governed by the following release strategy that organises updates into Release Trains that progress through a series of rings.
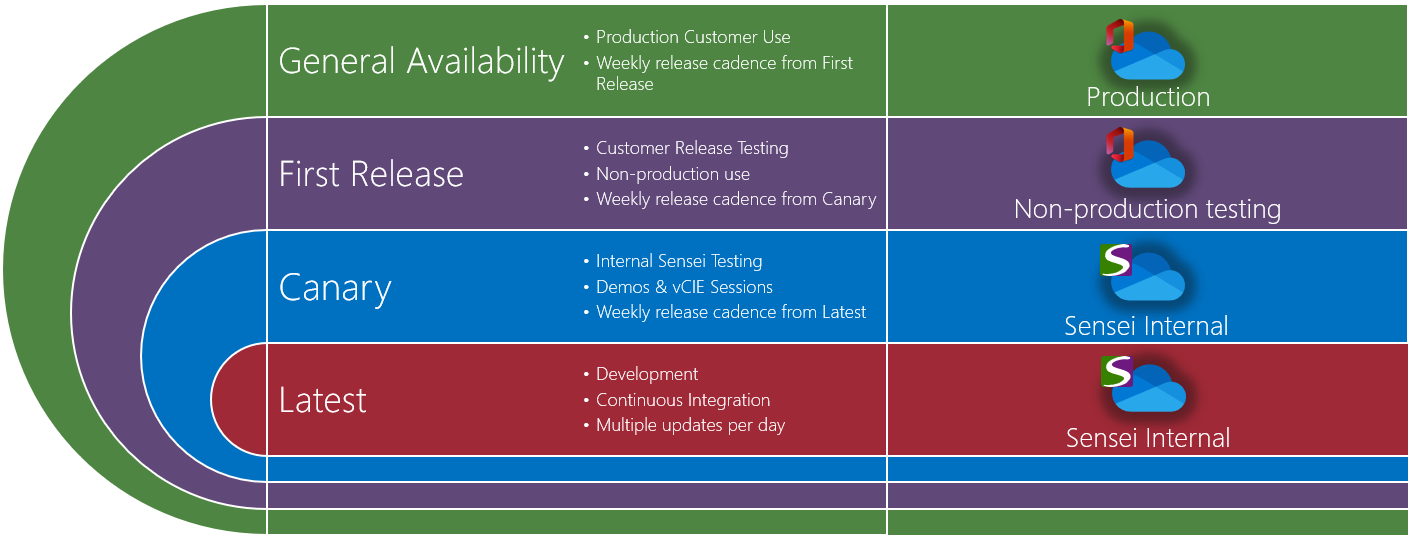
A release starts every week from our internal Latest environment when testing has been completed. The first stop for the release train is the Canary Ring where the release is tested internally by our staff in real-world use cases. After a week in the Canary Ring without any issues, the release progresses into the First Release ring where customers who have non-production environments who would like to test updates early can then perform their own assessment. Finally after a week in the First Release ring, the updates are then applied to customer deployments in the General Availability ring
Note
- By default customer environments will be placed in the General Availability ring.
- Customers can utilise the the Sensei Hub to suspend updates to their own deployments.
Telemetry
Diagnostic telemetry data is used to keep Sensei IQ secure and up-to-date, detect, diagnose and remediate problems, and also make product improvements. This data does not include a user’s name or email address, the content of the user’s files, or information about the projects, programs or portfolios managed by the product.
Our system uses a unique ID associated with user’s diagnostic data. For example, if we receive diagnostic data showing that one of our apps crashed 100 times, this unique ID lets us determine if it was a single user who crashed 100 times or if it was 100 different users who each crashed once. We don’t use this unique ID to identify a specific user.
Sensei uses Microsoft Application Insights for Telemetry collection management and storage. Sensei collects the following telemetry data items in addition to the default items collected by Microsoft Application Insights:
- Tenant ID
- Tenant Name
- Application ID
- Application Name
- Organisation Unique Name
- Organisational Currency ID
- User ID (guid)
- User TimeZone offset
- User Security Roles
- Browser Language
- Entity Type Displayed
Event Type Action
In addition to telemetry collected by Sensei, vendors of the platform services will also collect telemetry:
A Sensei IQ customer can opt-out of Telemetry collection, via the Instrumentation Key setting.
Software Boundaries and limits.
The current software boundaries and limits are inherited from the relevant underlying Microsoft platform components.
Project for the Web
Project for the Web boundaries and limits:
Project Limitations
| Field | Limit |
|---|---|
| Maximum total tasks for a project | 500 |
| Maximum total duration for a project | 3650 days (10 years) |
| Maximum total resources for a project | 150 |
| Maximum total links (successor only) for a project | 600 |
Task limitations
| Field | Limit |
|---|---|
| Maximum hierarchy level | 10 levels |
| Maximum links (successor + predecessor) | 20 |
| Maximum duration of leaf task | 1250 days |
| Maximum duration of a summary task | 3650 days (10 years) |
| Maximum resources assigned to a task | 20 resources |
| Supported date range for a task | 1/1/1984 - 12/31/2149 |
Other platform components
Additionally limits from the following underlying products also apply:
- Power Apps
- Power Automate
- Common Data Service
- Power BI
- Microsoft Teams